A diary of the construction of a large 00 scale model railway layout
No. 150 A lower ride with the Bachmann Deltic
Get link
Facebook
X
Pinterest
Email
Other Apps
My last Post https://longsheds.blogspot.com/2018/12/no-149-deltic-dalliance_31.html
reviewed past ready-to-run Deltic models. The message was that the prototype
was large, lengthy (and noisy) and that a scale model was not compatible with
train set curves. In an attempt to solve the issue Bachmann appeared to have
adopted a ‘Belt and Braces’ approach. The Bachmann model has a narrower profile
for the leading bogie wheels while at the same time thinning the bodywork with
‘cutouts’ in the vicinity of the front and rear bogie wheels. Then in addition,
Bachmann controversially raised the running height of the model by almost 2mm
(6inches). The perceived wisdom on the ‘web’ is that it is relatively easy to
lower the Bachmann model to give the correct ride height. I would take up the
challenge.
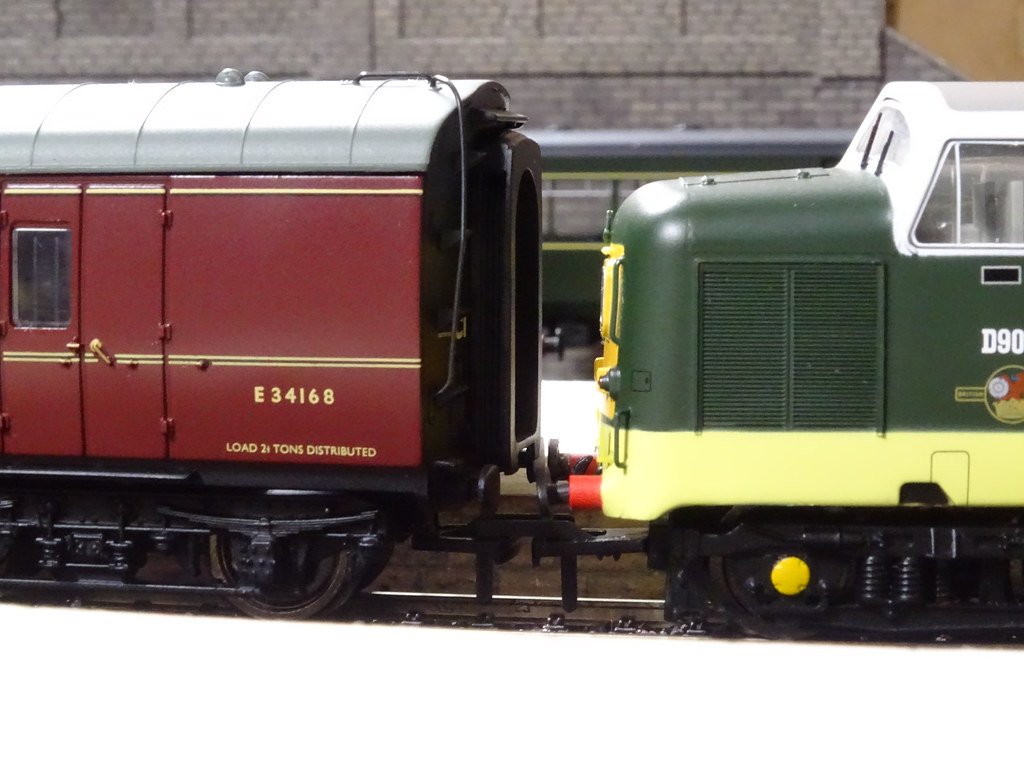
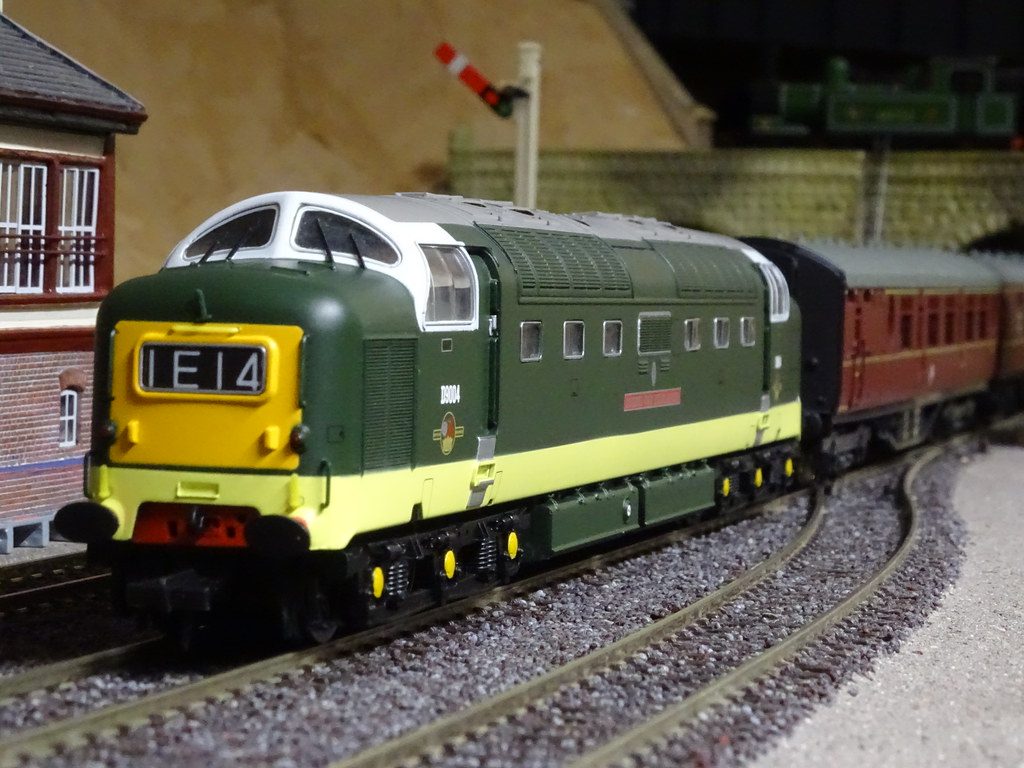
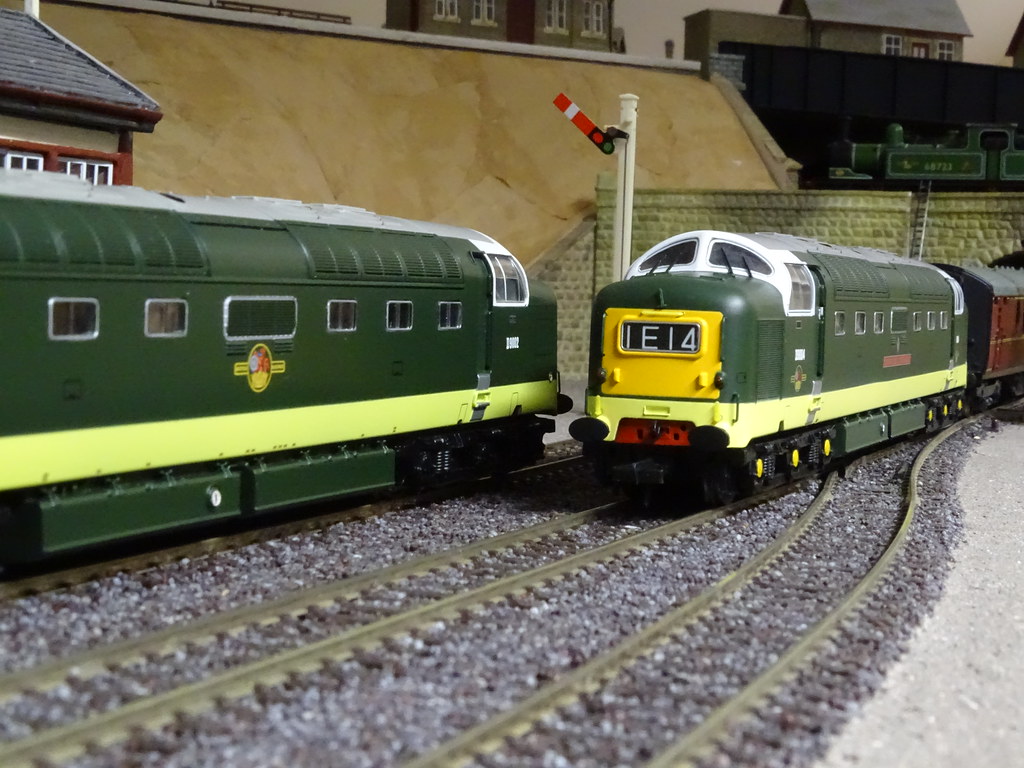
Bachmann D9004 Queen's Own Highlander, lowered and
coupled to a Bachmann Mk1
As with a lot of things in life there is generally more than
one route to the desired goal.
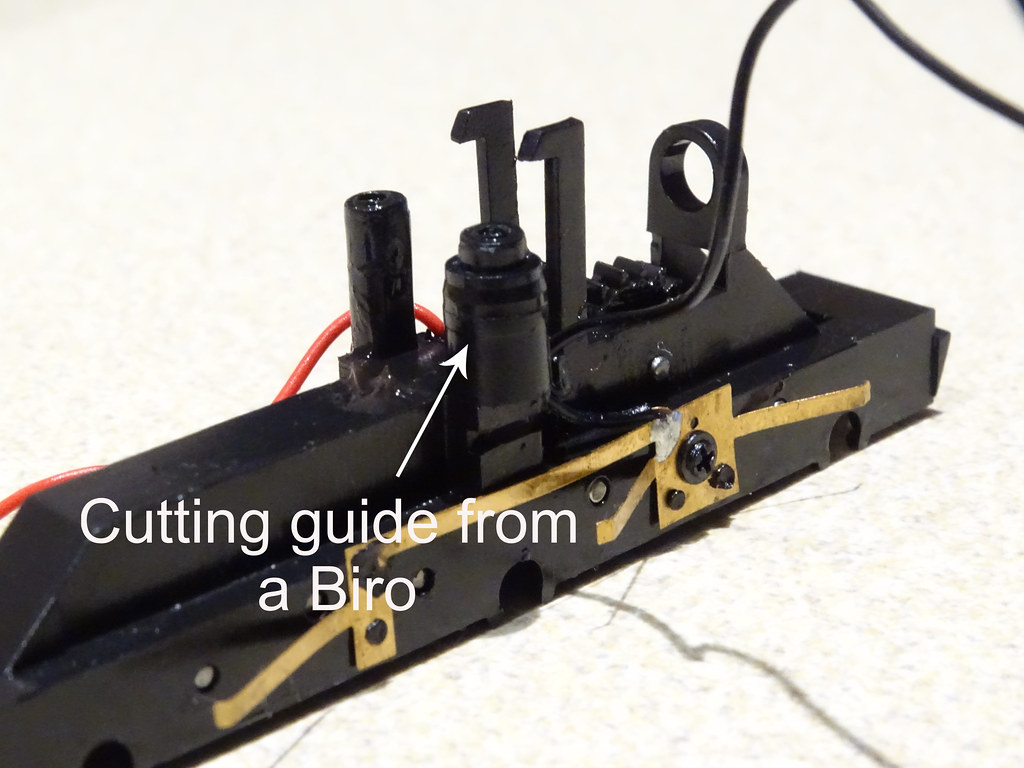
MkII Bogie Tower 'as bought'
Probably the shortest route to follow involves cutting away
the plastic wings on the top of the bogie towers. If this doesn’t provide the
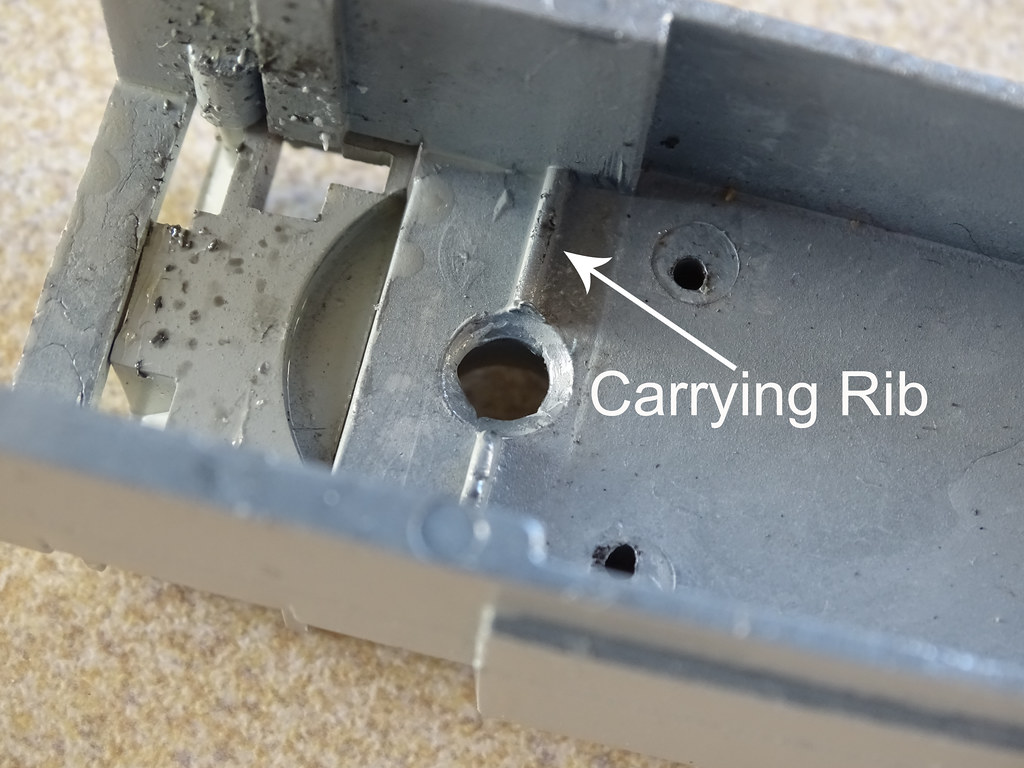
necessary ‘drop’ in height then the bogie support ribs within the Bachmann
chassis block can be ground down.
Carrying rib for bogie tower
It follows that it is also necessary to reduce the overall
height of the tower lowering the shoulders of the top spigot so that it can
poke further through the chassis block.
I have not attempted this route as I was seriously unhappy
at the thought that I was ‘damaging’ both the chassis block and the bogie
towers and that in the event that the results were not as expected the process
would not be reversible. I also had a residual concern as to whether the free
rotation of the bogie towers might be compromised, particularly where there
were changes of both horizontal and vertical track profile at the same time.
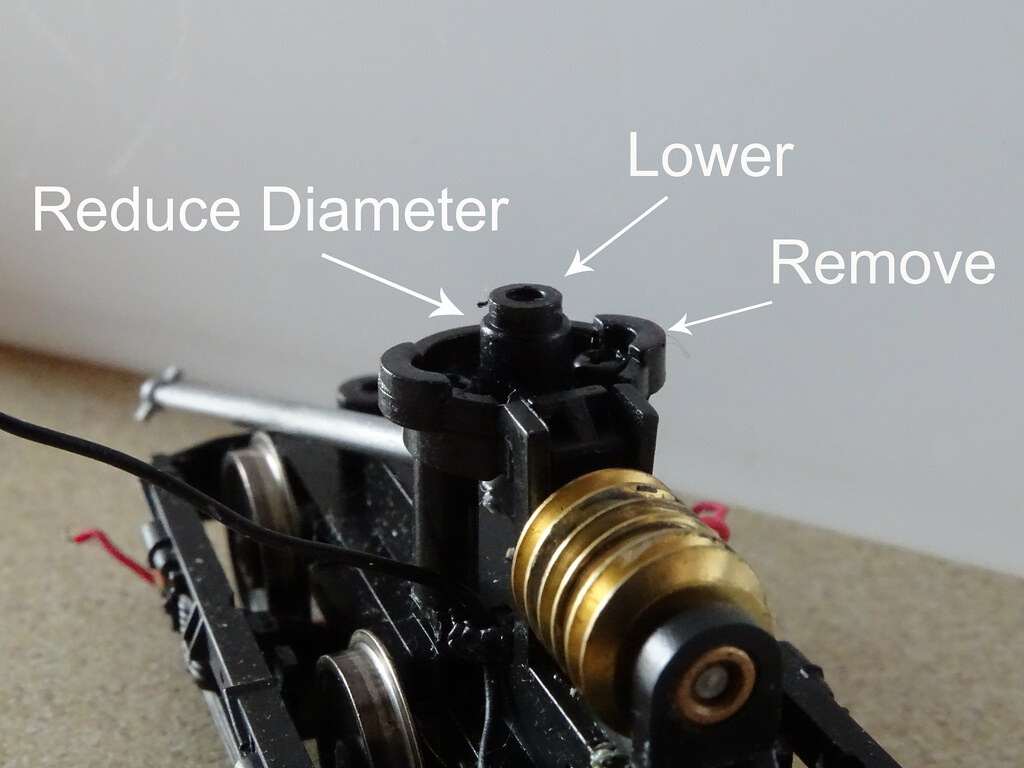
Bachmann Bogie Tower Mk III
Bachmann have changed the design of their bogies and the
latest (I shall call their MkIII bogie) has thicker ‘wings’. It occurs to me
that the required drop in height might now be achievable without the need to
grind any of the chassis away. I wonder if anyone has gone down this road?
Bachmann Bogie Tower Mk II
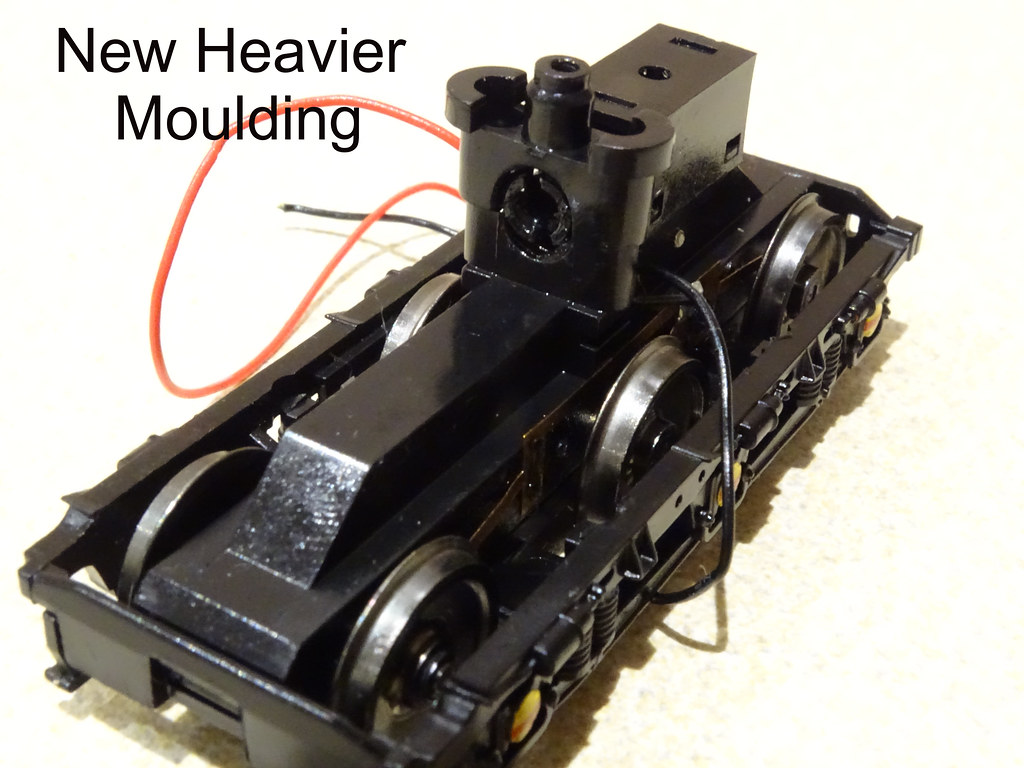
I decided to avoid any grinding and to concentrate on the
bogie towers. (Mk1 with four wheel drive and MkII with six wheel drive are
identical in this respect.) If I was to be unsuccessful spare towers are
available off eBay or from Bachmann. First I shortened the two support pillars
that feature either side of the drive shaft. Ideally these should be reduced in
height by 2mm but in retrospect it would be better to aim for 1.5mm. I think
they are formed from Nylon. They are certainly very tough and do not readily
cut with a craft knife. Too much pressure with a knife blade and there is a
danger that they will snap off the main body of the bogie. I used part of ball
point pen to make a circular collar to slip over the column supports and to act
as a height guide whilst I carefully pared away the top of the column. Getting
both pillars the same height is paramount.
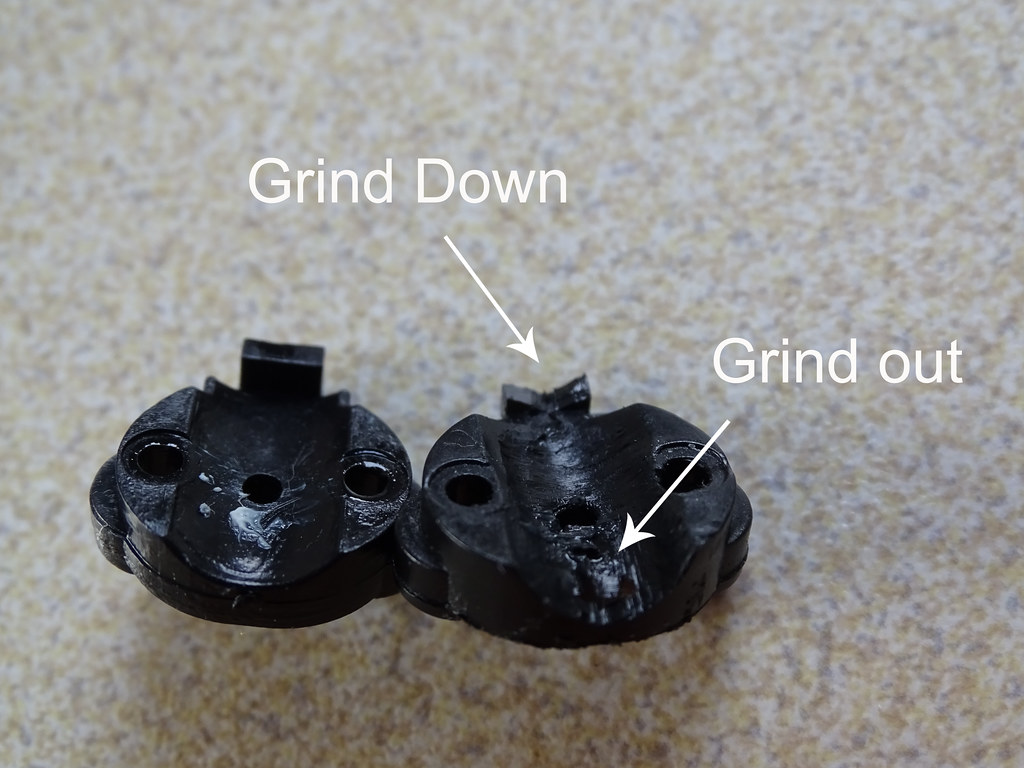
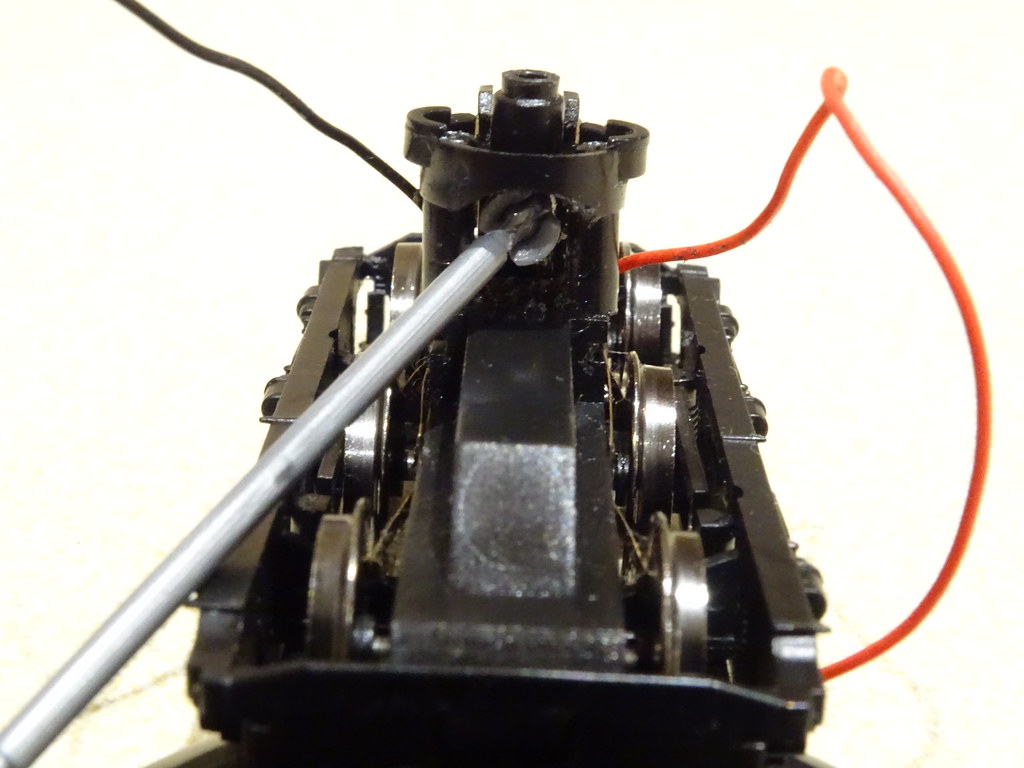
Bogie Tower caps, 'as bought' left, 'ground out'
right
The caps that are screwed to the tops of the tower also need
some attention. I used a grinding tool attached to my Proxon drill (similar to
a Dremel). The tab at the ‘back’ of the cap that presses down on the worm drive
needs to be reduced in height to match the change in height of the columns.
Depending on whether the column height was reduced by the full 2mm or by a
slightly lesser amount it might also be necessary to grind some of the plastic
away from the underside of the cap to make more space to accommodate the drive
shaft coupling to the worm. I have to admit to the process being rather one of
trial and error.
Bogie Towers, before left, after lowering right
I should also point out that the columns have a blind hole
in them for accommodating the cap fixing screws. I drilled these deeper with a
1mm diameter bit.
After reassembly and reattachment to the metal chassis block
my model sounded like the proverbial ‘bag of nails’. I spent a couple of
evenings trying to figure out what was catching only to eventually realise that
the bottom of the tower to chassis fixing screw was rubbing on the drive shaft
coupling beneath the cap. I used a file to remove about 1mm in length..
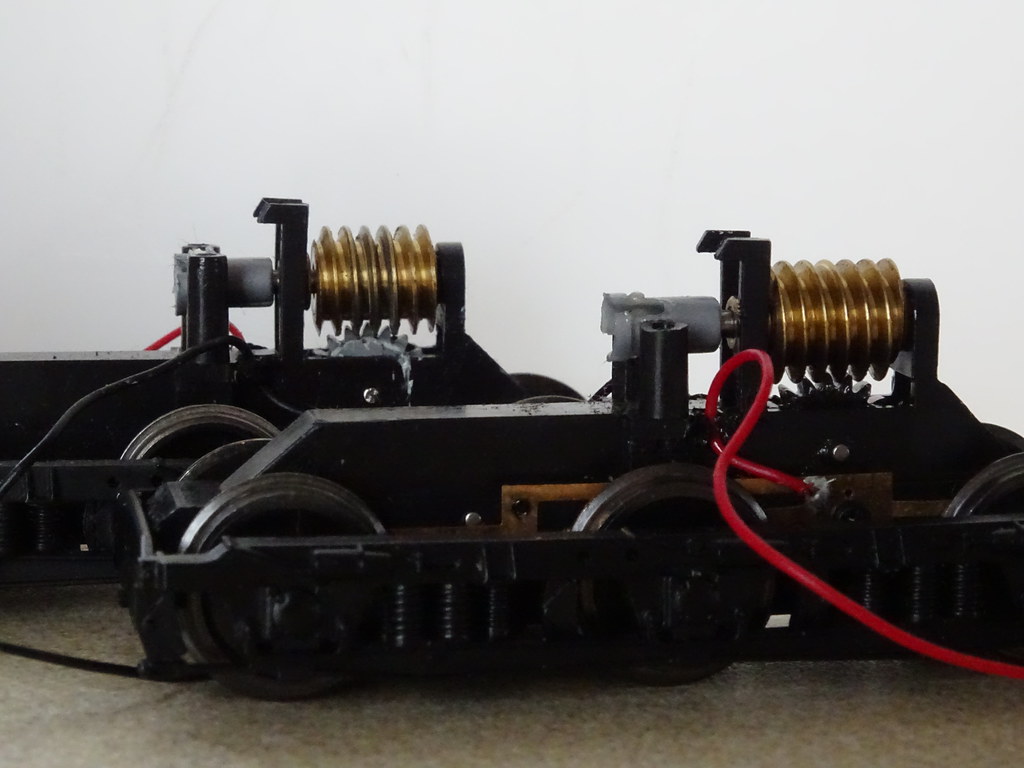
There are three views below of finished bogies.
Bachmann Deltic Bogie Tower - Lowered
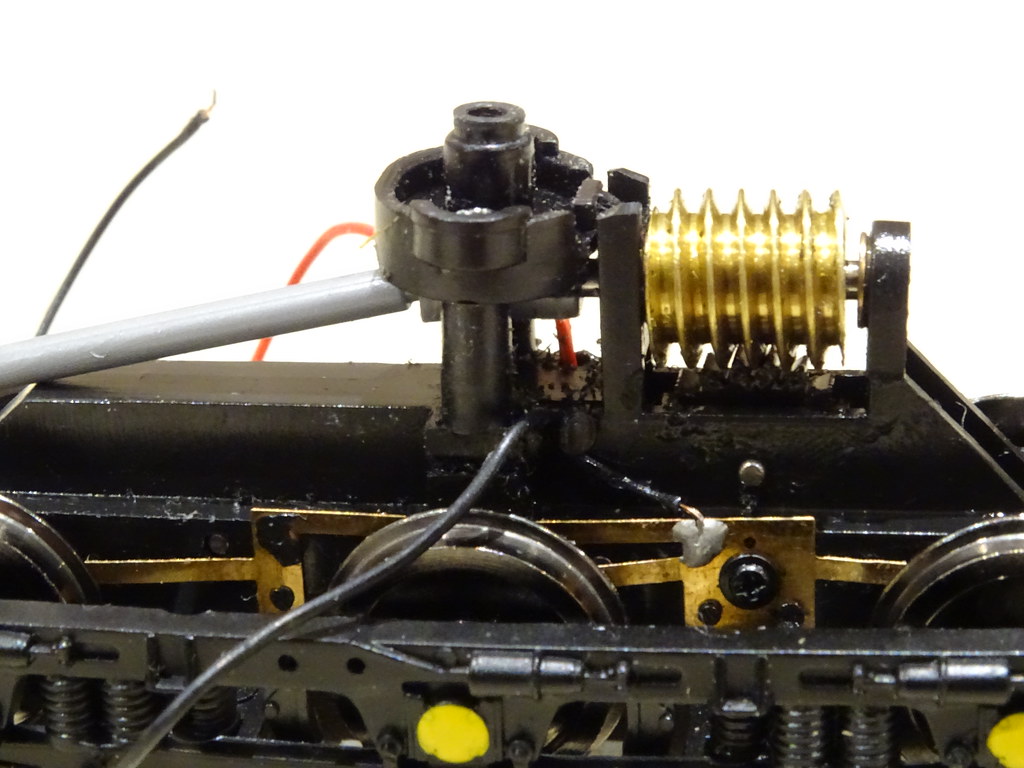
There are a couple of guides on either side of the worm.
These seemed to be surplus to requirements and at one point I thought they
might be catching the underside of the chassis block. I cut the tops off them.
Bachmann Deltic Bogie Tower - Lowered
The space between the columns which accommodates the drive
shaft coupling is very tight and I pared some plastic off the inner faces of
the columns.
Bachmann Deltic Bogie Tower - Lowered
I have now converted two sets of bogies and there are some
views below of the reassembled models.
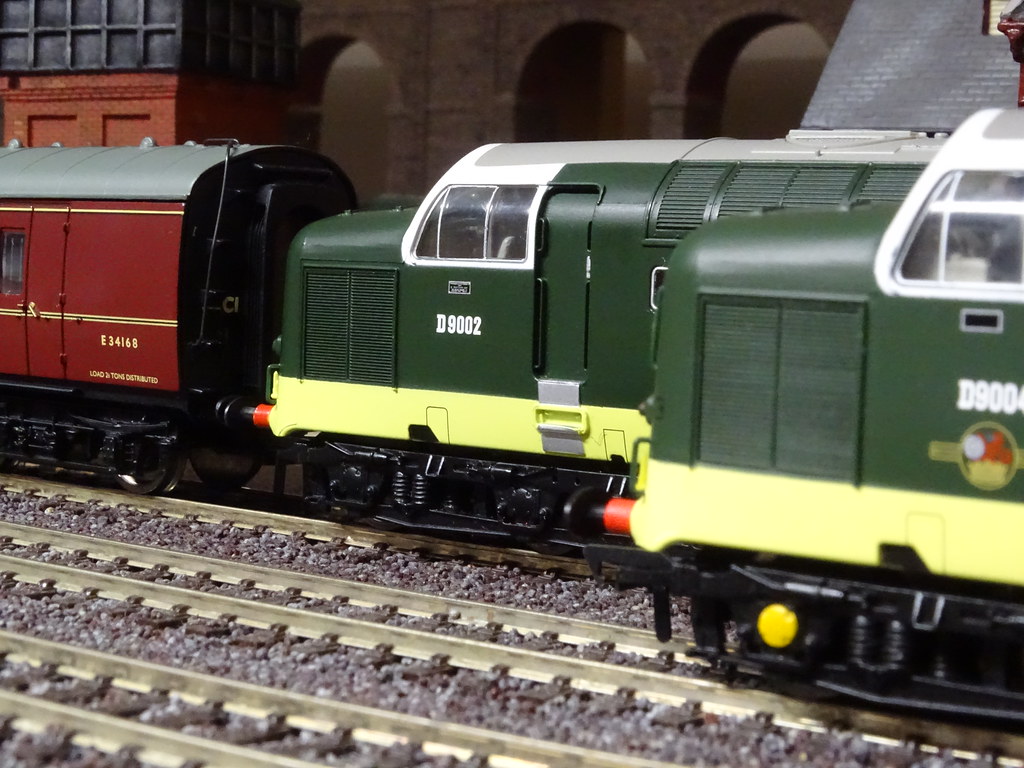
Bachmann models D9002 and D9004 with lowered body
shells
Bachmann D9004 Queen's Own Highlander with lowered body
shell
How does it work? Surprisingly well, there is a YouTube
video showing one of the lowered models running round the layout.
I have included a scene showing the model successfully
negotiating two pairs of Mr Peco’s old fashioned Medium Radius Streamline
points from the 1990s.
What could possibly go wrong?
Everything appeared fine until I started to carry out some
un-prototypical movements – running the wrong way through sets of points. I had
particular problems with a Peco Streamline curved point. Coming from the curved
branch the front wheels of the bogie would leave the track whilst exiting the
point at the end with the blades. Whilst the Peco curved points have ‘form’
when it comes to causing derailments, there is another cardinal rule on any
model railway to the effect that if all the other rolling stock runs faultlessly
– then the fault is with the engine or wagon and not the track.
On closer inspection it was apparent that my model had a
slight ‘lean’ to one side. The Bachmann towers are surprisingly precise and
despite the apparent sloppiness of the tower fixings to the chassis it is
essential that the caps at the top of the towers are perfectly level across the
width of the chassis. (A slight fore and aft tilt doesn’t seem to matter so
much.)
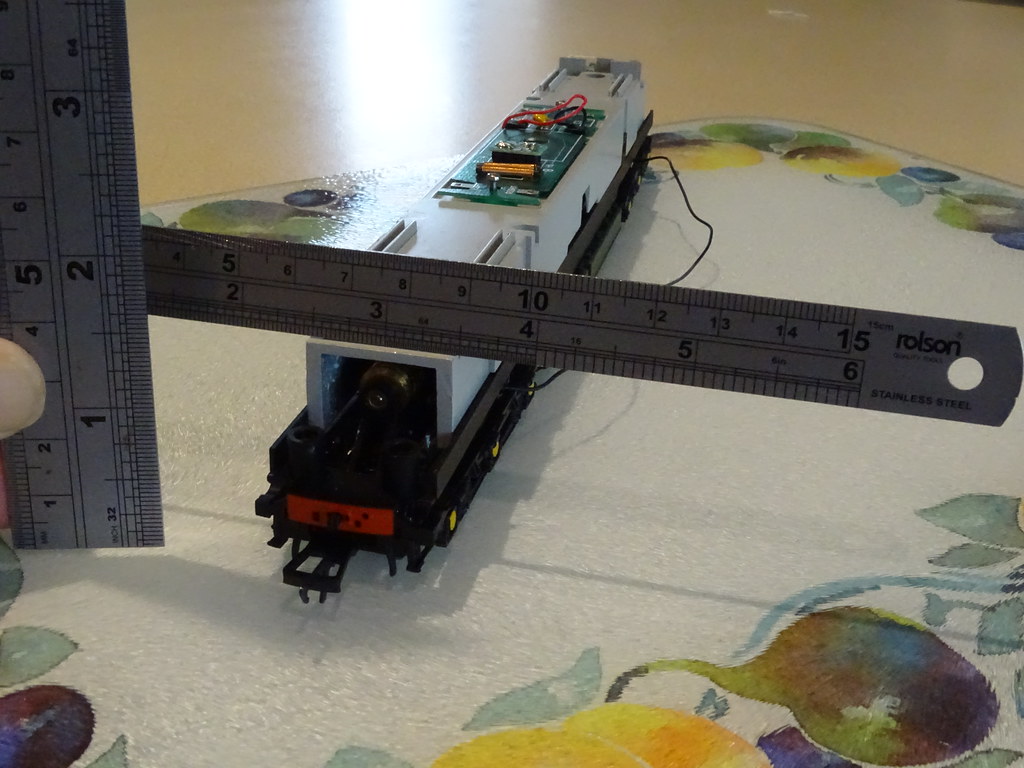
Is everything square?
I placed a steel rule across the chassis and measured the
height on either side. I kept the bogies a ’loose fit’ and stood the model on a
glass chopping ‘board’. It was then relatively easy to adjust the tops of the
columns to bring the caps at the tops of the tower level. How easy? Well it is
easy enough to pare plastic away but I also had to add a couple of shims
(homemade plastic washers) to the tops of a couple of the columns where I had
been too enthusiastic. After squaring everything up the model runs perfectly.
A reminder
It makes life a lot simpler refitting the bogies into the
chassis if the drive shafts are fitted the correct way round. The shafts are
‘handed’ and the spherical end needs to ‘pop’ into the bogie coupling whilst
the rectangular ‘fins’ need to be able to slide within the motor coupling. I
suspect that having the shafts fitted correctly makes the running quieter.
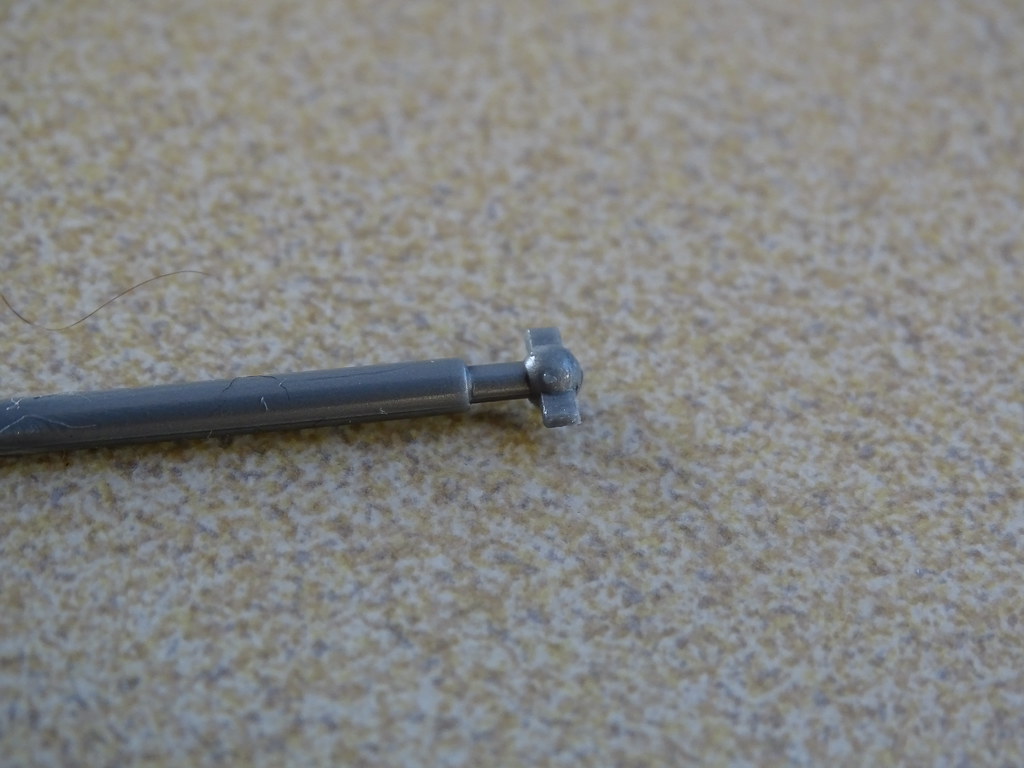
Drive shaft spherical connection to bogie
Drive shaft rectangular connection to motor
Conclusion
Is it worth the effort? I am not sure but I enjoyed the
challenge.
I have been taking advantage of the Spring Sales and have bought myself a BR black engine driven Oxford Rail Dean Goods. I bought my first Dean Goods back in 1985. It was a Mainline model with a tender drive. The perceived wisdom was that the model was conceived and designed by Airfix just before that company folded. I thought the tender drive came with an unrealistically high mound of coal, to hide the motor, and it could be noisy. It did have a good haulage capacity. Mainline Dean Goods from 1985 I thought the model well detailed for its age and I believe reasonably accurate. It was one of the earliest mass produced models to feature blackened coupling rods. Oxford Rail Dean Goods from 2017 Moving forward to 2017, Oxford Rail introduced an engine driven Dean Goods. This model has generated significant ‘froth’ from modellers, particularly those interested in pre-nationalisation engines who note numerous dimensional and detailed deviations fro...
I was recently paid for some unexpected work. I would invest part of the proceeds in some additional motive power (more engines). I don’t think there are any model shops in Dumfries and Galloway (probably the largest Council in the UK) so it is very much a case of what is available on the Internet. All very exciting – well until the post arrives! The first item should have been straightforward. I would buy a Bachmann BR ROD - pristine. Bachmann BR ROD – Early Emblem – Pristine The model came from a well respected source, not eBay, but oh dear what was in the box was not what was on the label. Bachmann BR ROD – Weathered I will not embarrass the retailer further. The problem is being sorted. My engine is still in his cabinet and will be released as soon as the weathered version is returned - at his cost. The very same courier that delivered the ROD also brought my second purchase – Hornby’s Bucklebury Grange. I was too late to buy Overton Grange ‘new’ and I ...
As Autumn approaches it is time to put the garden to bed and to come inside and play trains. I am revisiting the north east of England in the early 1960s and I have resurrected my Bachmann Elizabethan train set. The splendid wooden box contains a model of 60017 Silver Fox with late crest and six maroon Thompson coaches. For use on my layout I had already added some extra lead ballast to the engine as detailed here in an earlier Post . A4 60017 Silver Fox heading the Elizabethan Firstly a little bit of history. Bachmann marketed ‘The Elizabethan’ to mark the fifth anniversary of Bachmann Branchline. I calculate that the set dates from 1995. Bachmann Elizabethan 31-1995 In 1970 the model train manufacturer Trix had produced an 'OO' scale model A4. In 1974 it was re-branded as a Liliput model. Kader, Bachmann's parent company, bought Liliput in 1993 and according to the entry on Wikipedia modified the Liliput A4 to produce their Bachman...


Comments