No. 170 The Little People

Some of Martin’s 3D Printed and Painted Figures
Problem is that printer files for suitable little people are in short supply, or are expensive. Given that finishing and painting the newly printed figures also takes a lot of time and patience I would instead explore the range of readily available finished little people. Suitable UK figures are available from Bachmann, Hornby and Modelu. Bachmann USA, Preiser and NOCH also market figures but these are generally to HO scale which at 3.5mm to the foot is rather small for OO gauge at 4mm to the foot. For layout use where the viewing distances are greater I chose some ready painted little people from the Bachmann Scenecraft range. I thought these were a good compromise between cost and detail. These figures are described as being 00 scale and as far as I can tell are mostly around 22mm tall, equivalent to 5ft 6in full size. By shopping around these ready painted figures can be obtained new for under £2.00 per person. At this price level it is even worth buying and making subtle changes to better fit with my 1960s period layout.

Bachmann 36-043 before backdating (top) and after (bottom),
Brown paint on the barrow, silver badges and buckles, blue ties, not forgetting the green flag Historically to aid positioning of the ‘little people’, they came with a pre-attached paving stone. What if I didn’t want the paving stone and what if I didn’t want to fix them permanently in place with glue? My platforms are all topped with balsa wood. I decided to ‘pin’ my figures using a short piece of wire, poked into a hole drilled in one of the feet. The figures are formed from soft plastic. It is a relatively quick job to make a hole in one of the feet using a sharp micro 0.5mm twist drill bit rotated with the fingers. It is then a quick job to gently poke a piece of 0.6mm wire into the opening which will generally stay in place without the need for adhesive.

Painful!
The wire is then trimmed to size to suit the thickness of the balsa wood topping.


Members of the Team in situ
In addition to the railway staff there is the ‘travelling public’.

Waiting
Then of course you have to be careful with the time frame. Would the lady have been studying her mobile telephone in 1960? No, it would have been a pocket timetable! (Thank you John for the notion.)

Still Waiting
Adding ‘little people’ is quite addictive and it is soon apparent that figures are needed in locations with no balsa wood. Most of my baseboards are a ½ inch medium density fibre board and it is relatively easy to drill a 0.75mm hole to accept the pin on the base of the figures. The biggest issue I had was finding the hole after I had drilled it. If the combination of 0.6mm wire and a 0.75mm hole produces too much movement, simply use a longer length of wire.

A tool for making fine adjustments
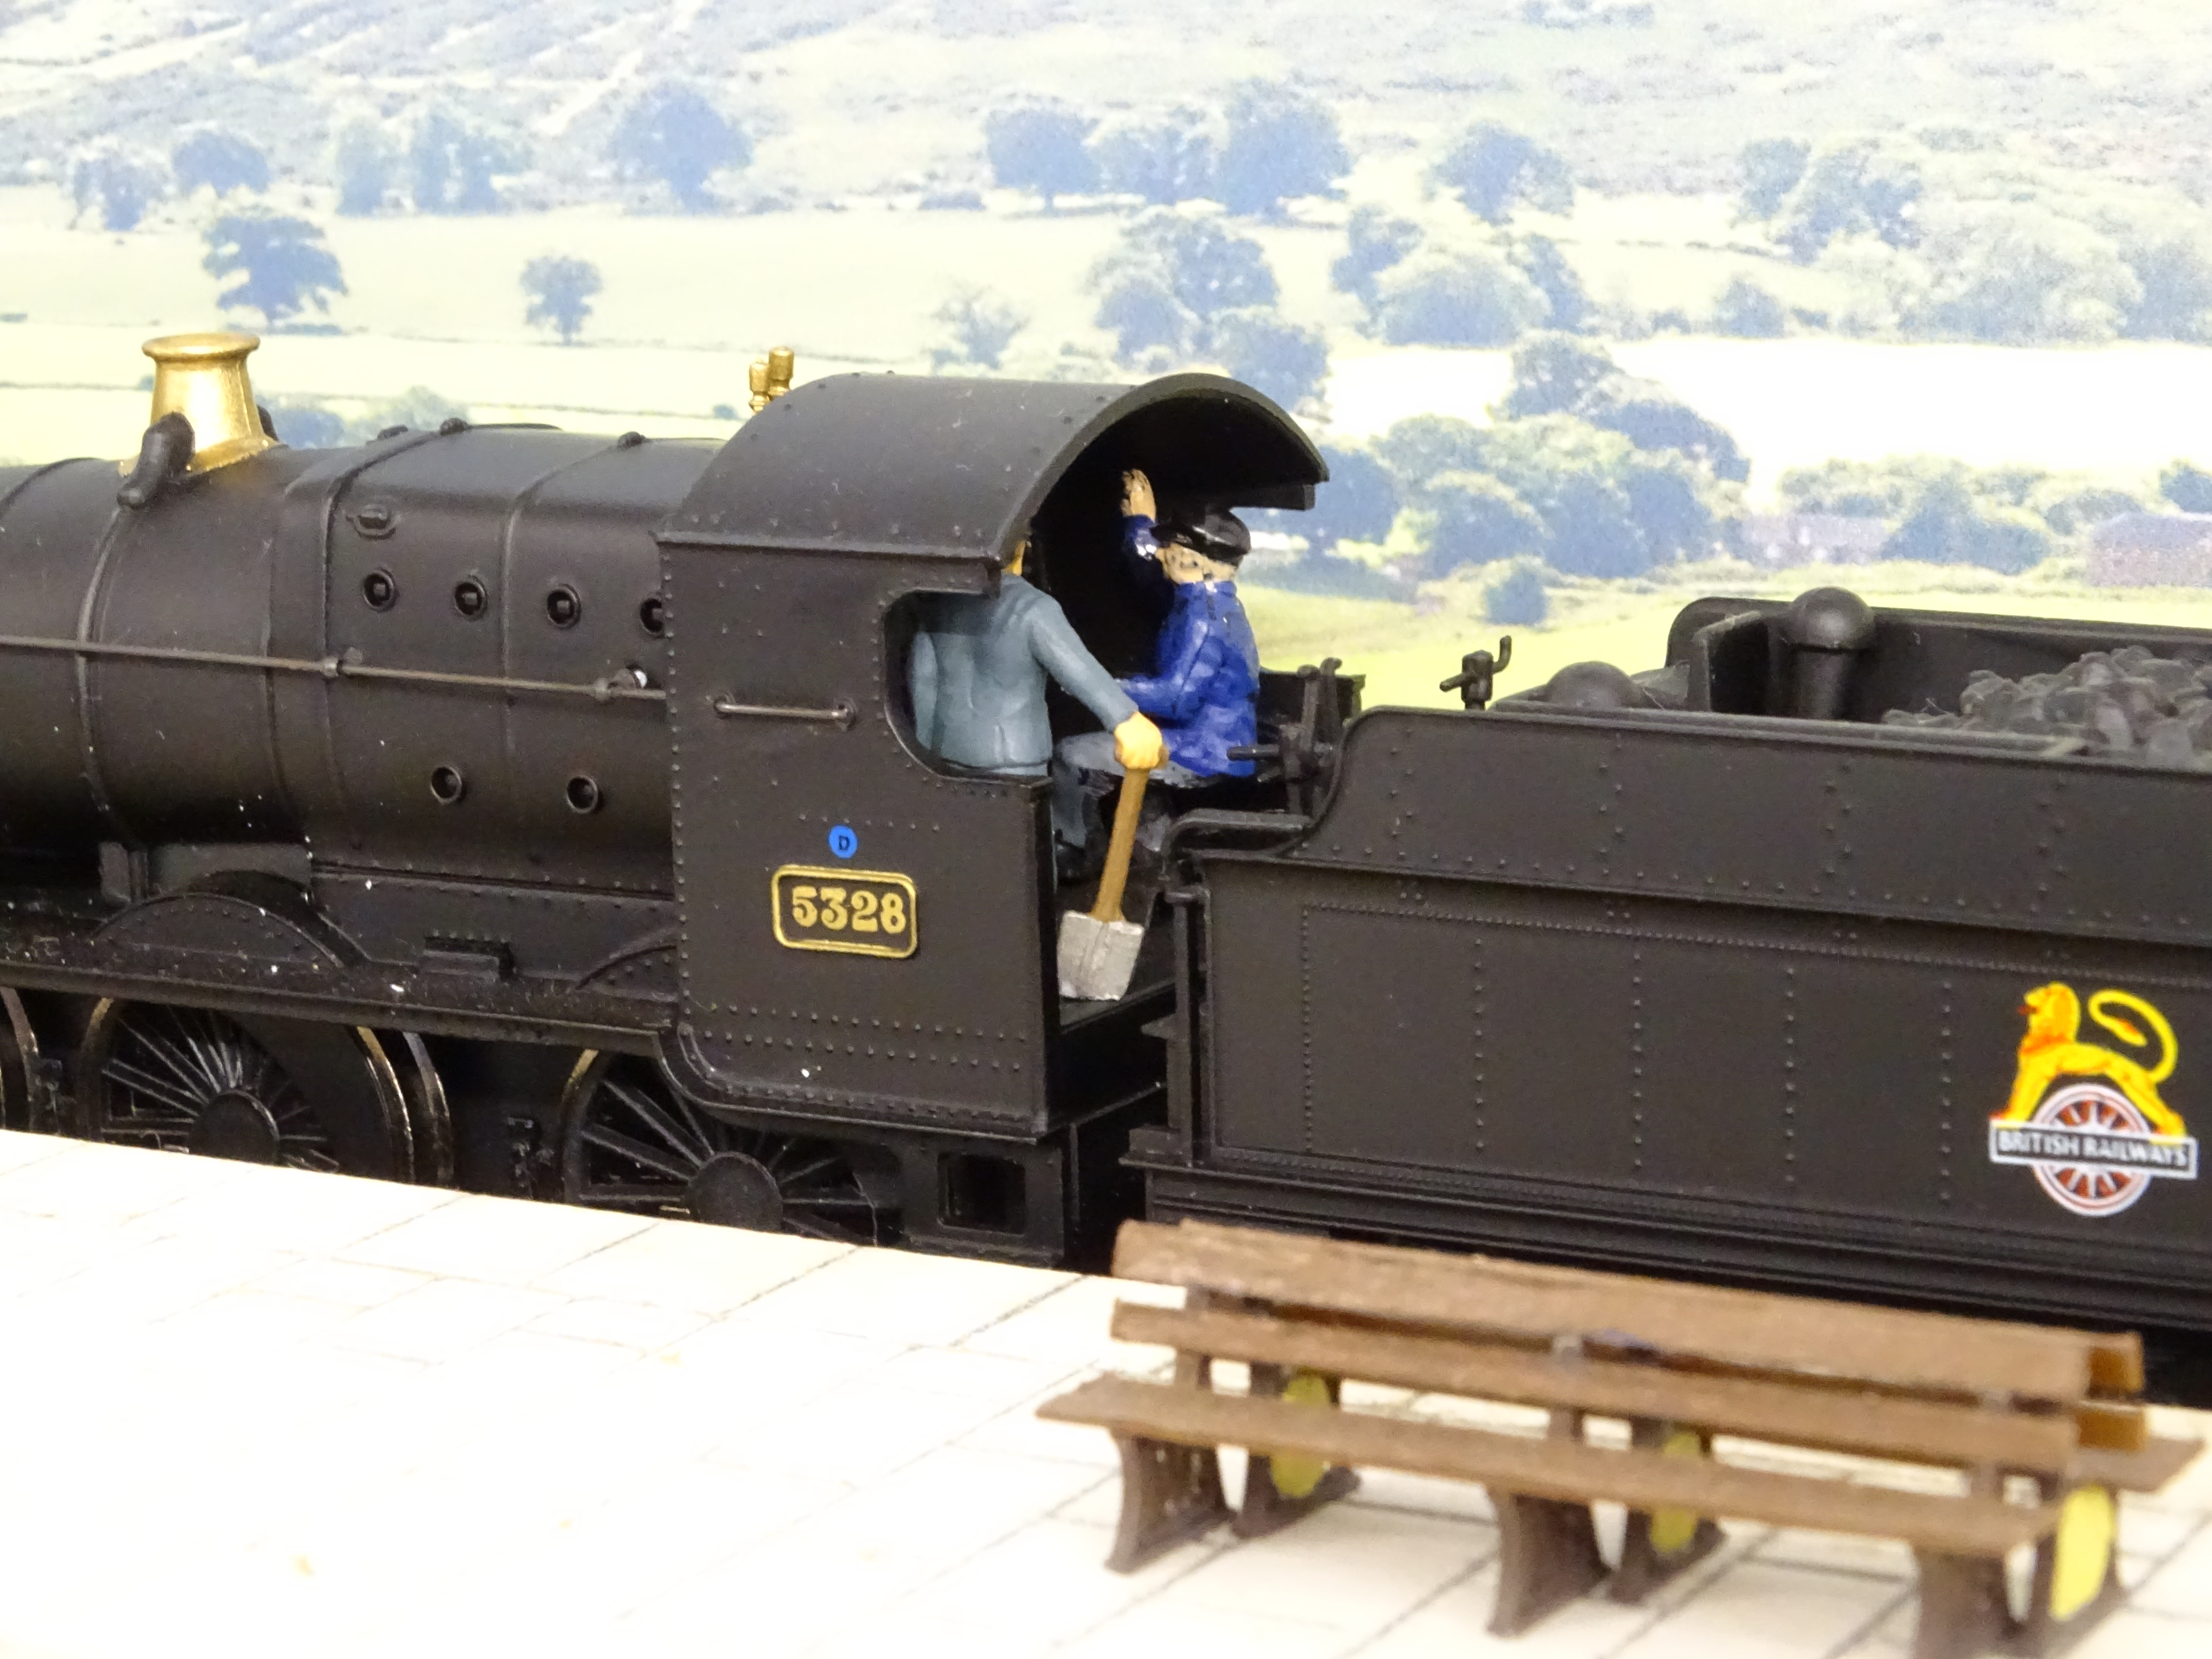
After the passengers and the porters there are the train crews. It is not so bad if you are running big engines or locomotives of the LNER with their spacious cathedral sized cabs where you cannot tell if there is a driver or not. However if you favour the old GWR locomotives where the cabs were too short to even need side windows it becomes very obvious that there isn’t a driver present. It bothers my wife. The idea of gluing a driver or fireman to the footplate of a £200 model also seriously bothers me. As an alternative to gluing to the footplate I would attach the driver and his fireman to a piece of black cartridge paper shaped to fit snugly on the cab floor. I used offcuts of the Daler – Rowney A4 Canford 150g/m Jet Black card that I had used previously for making corridor connectors.

First time lucky – my ex Mainline Dean Goods
I should point out that you need to be prepared to trial two or three pieces of card. Having cut out an initial piece of card this can be used as a template to shape and better fit a second piece.

The crew for the Dean Goods in the making
The little figures are pressed down onto tiny strips of 3mm wide double sided tape. In order to achieve the best possible bonding I lightly file the base of the figures so that they are perfectly flat. As a check I test to see if the figure will stand vertically without any support, the majority are able to. To date I have been able to slide my cartridge paper and figures into position without the need for any adhesive to touch the footplate. This lack of glue is a huge advantage where expensive models are concerned but there is also the ability to remove the crew whilst on shed and to transfer them to another similar engine. Now what about those models where some of the space on the footplate is taken up with a seat?
Ex Mainline 43xx
I guess the easy solution might be to stick the driver on to the seat. However to maintain the freedom to swap the crew to another engine I included a fold in the card to raise the floor beneath the driver’s feet sufficient for his backside to rest on the seat. As said already you need to be prepared to have two or three attempts at shaping the card!

Preparing the crew for the 43xx
The crew for the 43xx are historic, a bit like the engine. The driver had to be carved off the lump of plastic that he had been originally attached to.

Spot the raised foot rest
The next challenge was to fit a train crew into the cab of a tank engine. I have been playing with a sound fitted J72 and I would give it a crew. Having removed the bodyshell from the chassis, the lid of the Bachmann J72 is easily removed by undoing three pairs of screws. This makes the fitting of a train crew relatively quick and easy.


Bachmann J72 with crew
Not all engines can be dismantled as easily as the J72 and my Bachmann / TM G5 falls into the category of “difficult”. The plan for the G5 was to follow the same process as for the J72. However I couldn't easily lift the lid. The shape of the cartridge paper was cut initially from the J72 but in the event that the lid on the G5 couldn’t be removed I gradually trimmed down the cartridge paper until I was able to feed the paper with the crew attached through the cab door opening of the G5.

Ready and waiting for the Bachmann G5
The result I think is nearly very good. Manipulating the card has interfered with its snug fit so that the crew are a little bit more lively than I would have liked!

Bachmann G5 + loco crew
As already said I have become quite addicted to these little people.
There are more of my pictures in an Album on Flickr https://flic.kr/s/aHBqjBd8P8
Time now to finish writing this Post and to clock out.

Comments