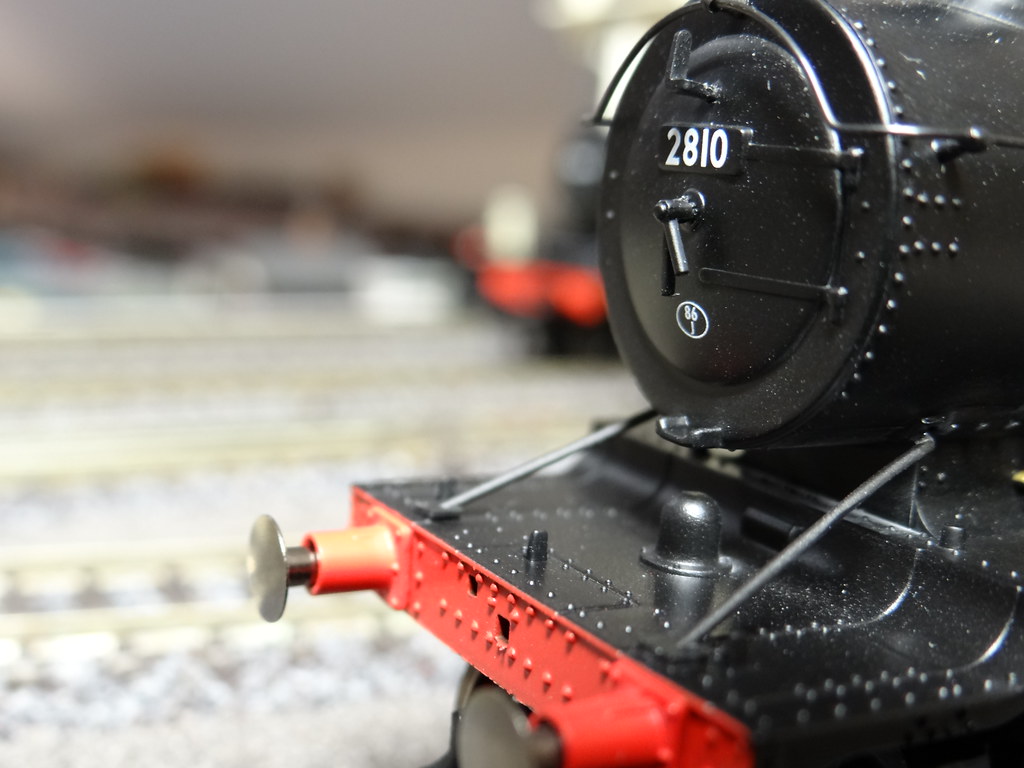
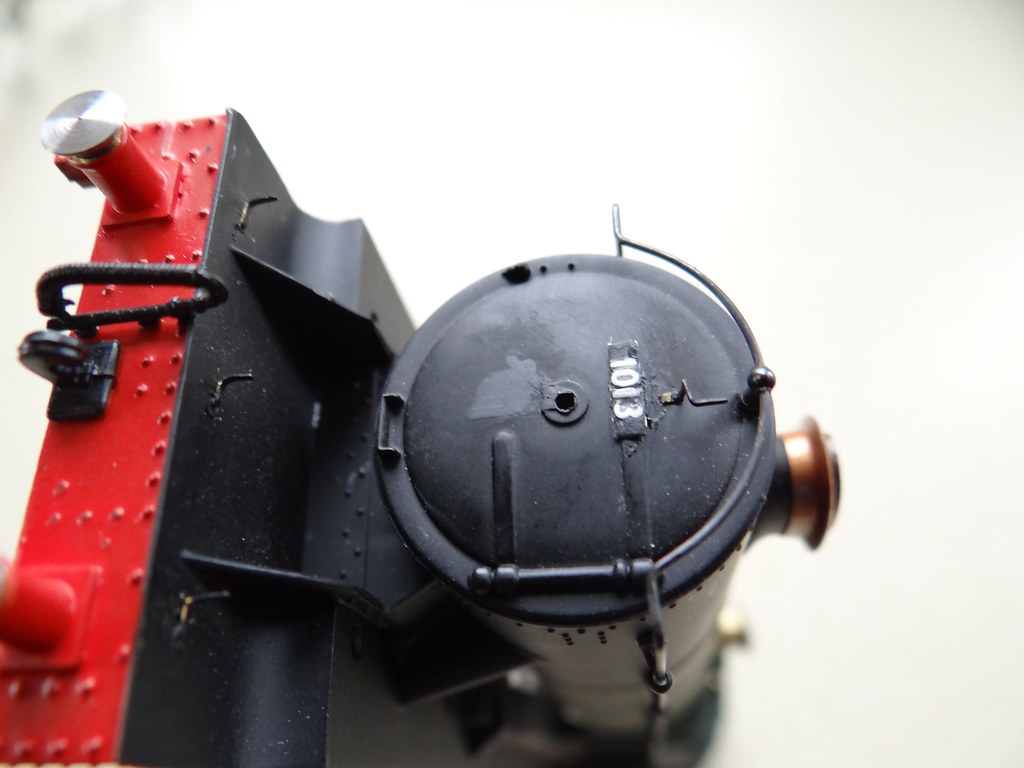
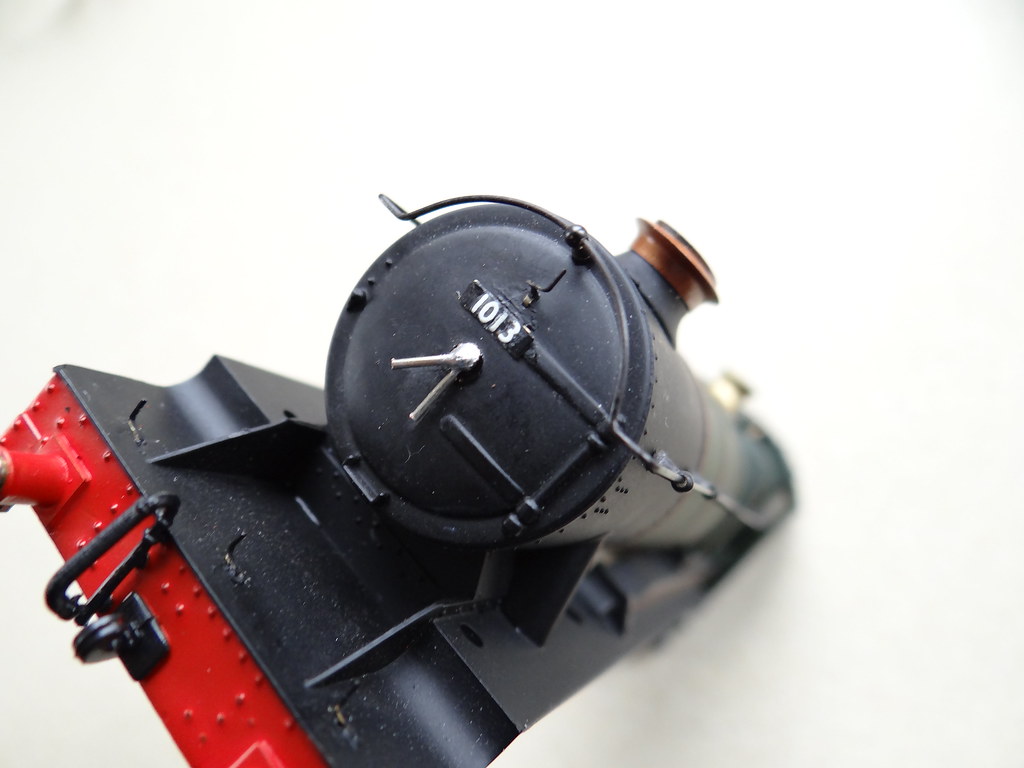
No.68 Smoke box darts.- or are they handles?
This is the final installment in a series of Posts about adding detail to a Hornby / Dapol County Class. After posting pictures of the Dapol locomotive body with its new lamp irons and replacement buffers I was directed by friend José in Argentina to ‘do something about’ the moulded smoke box handles.
Yes I know that there are turned brass items for purchase but I was born in Yorkshire and I still relish the challenge of saving some money!

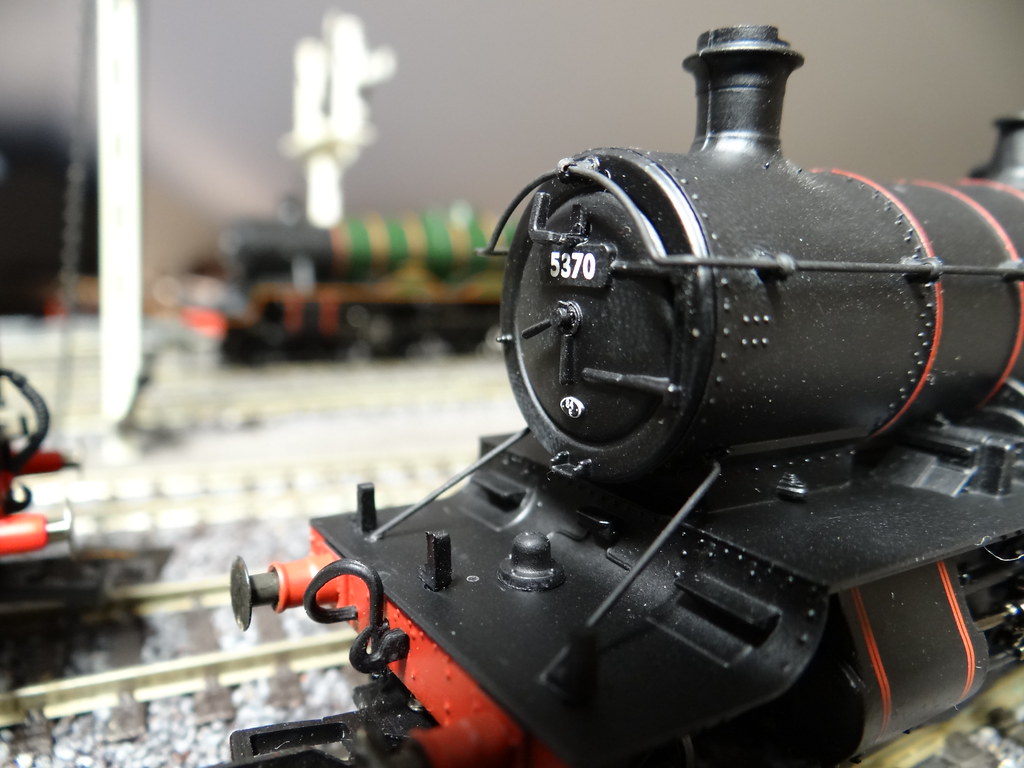
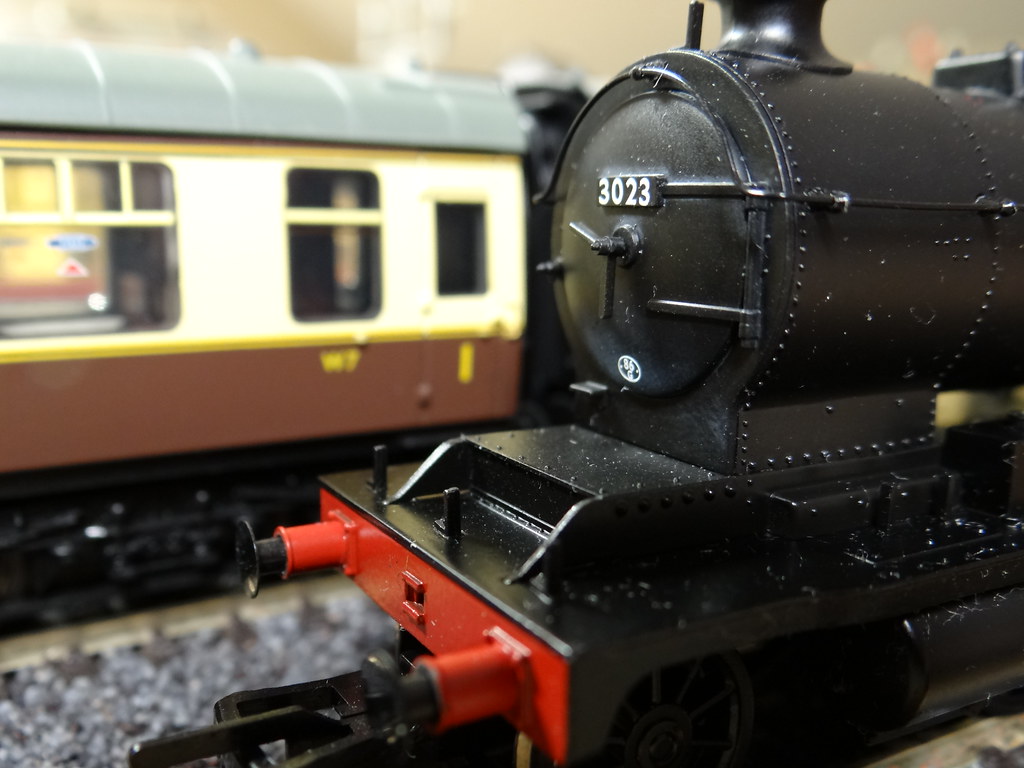
 Ex GWR darts courtesy of FJ Roche
What should Smoke Box Handles look like? Well there are drawings which variously show two equal length handles around 12 inches long, or on some drawings the lowest handle closest to the smokebox is elongated to 15 inches. How have Bachmann and Hornby modelled these handles?
 Bachmann 43xx
The early Bachmann engines such as the 22xx continued the Airfix Dapol tradition and moulded the handles as a lump of plastic on the front of the smoke box door. Later Bachmann models such as the Halls, Manors and 43xx compromised with the bottom handle still moulded on the face of the door, but with the top handle as a separate item.
 Bachmann ROD Class
Most recently Bachmann on their ROD Class locomotives have correctly modelled the two handles separate from the smoke box door.
 Hornby 28xx
The latest Hornby handles on the 28xx Class look to me to be almost perfect. In contrast the handles fitted to the slightly earlier Hornby Grange locomotives are to my thinking far too delicate.
 Hornby Grange
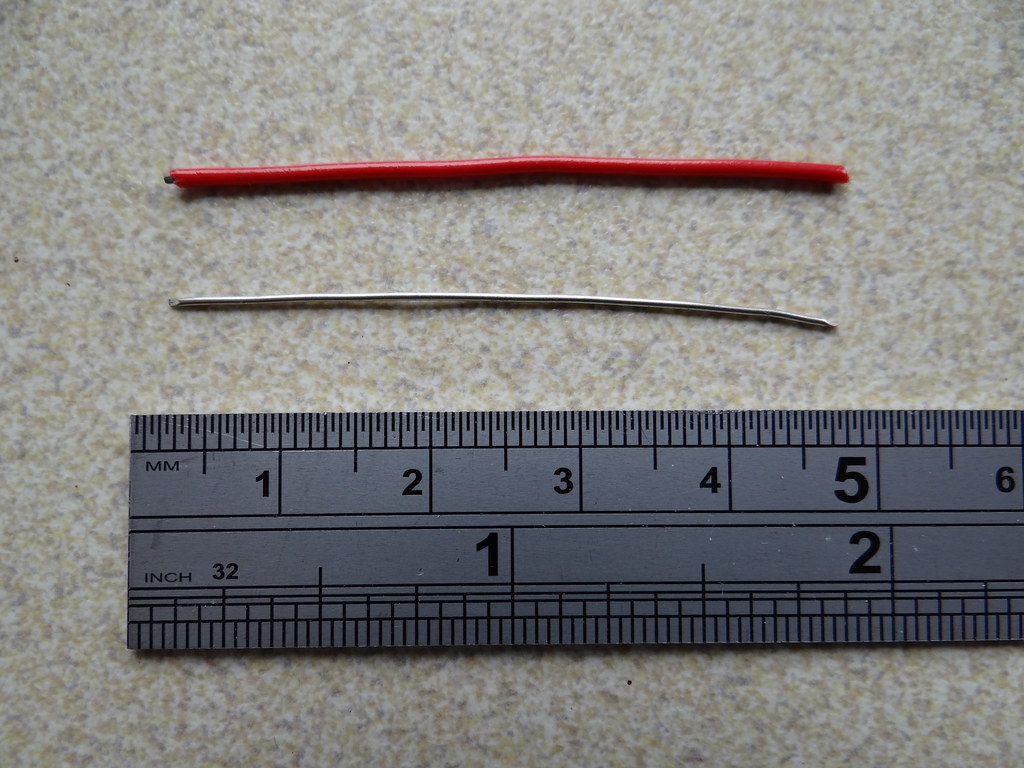
What about my Dapol County? More to the point, what materials had I available? I had wired up my control panels using single core 0.6mm wire – I had lots of bits left over and it looked very suitable.
 Single core 0.6mm wire
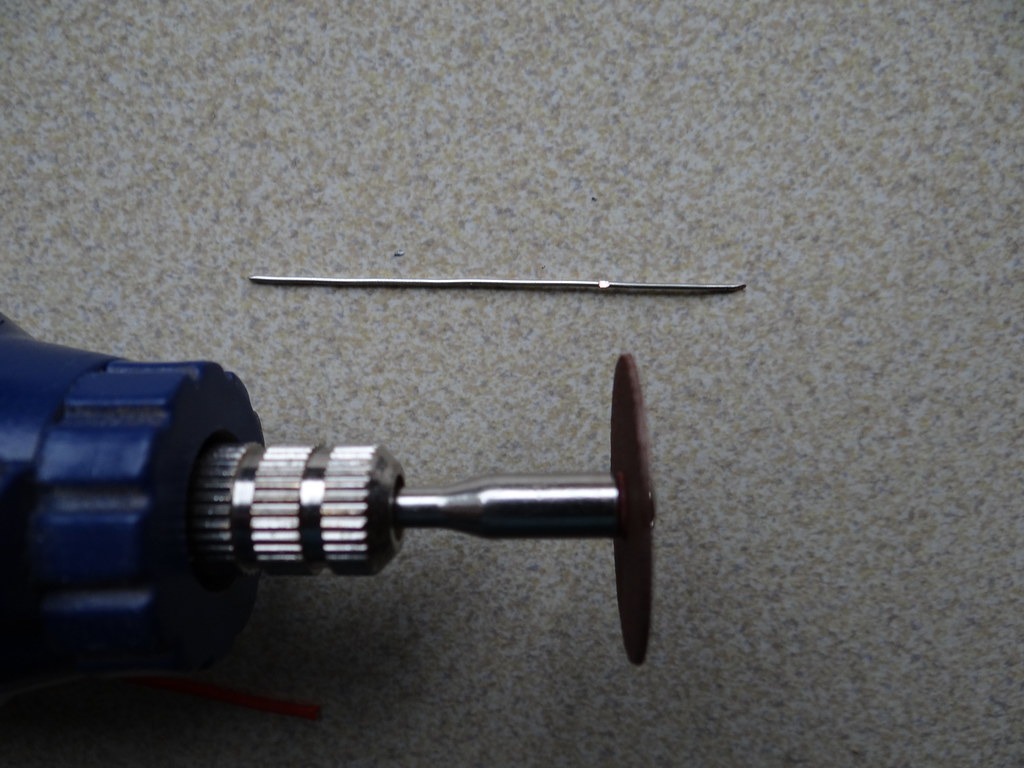
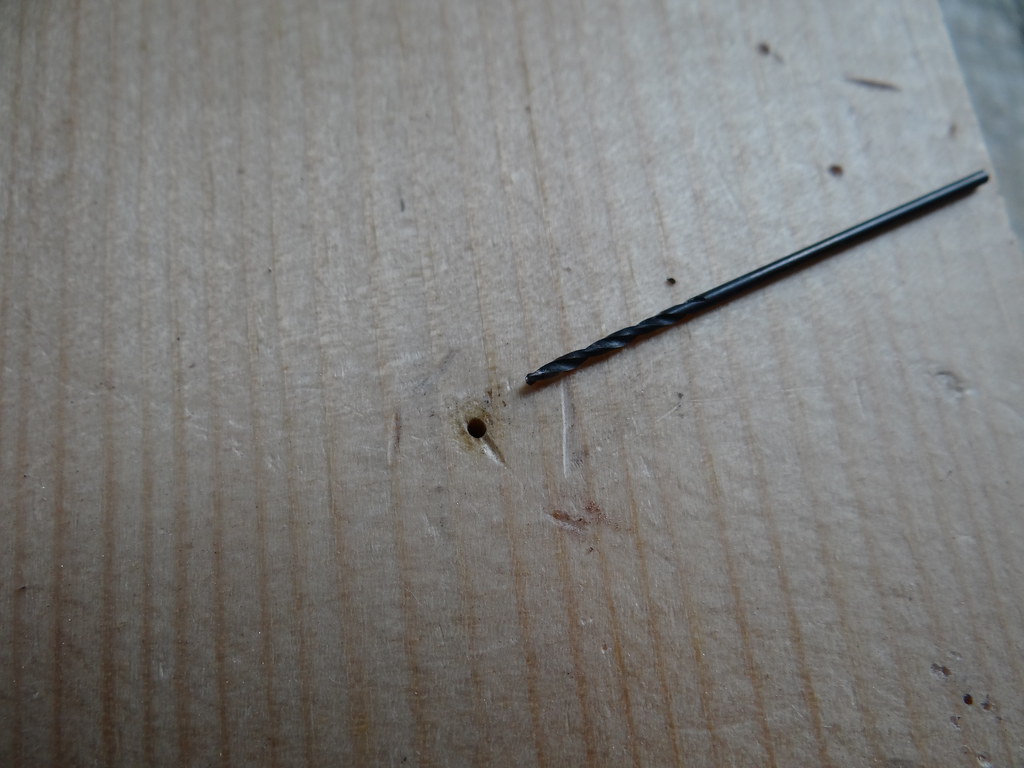
First the wire had to be stripped.
 Forming a notch
Then I used a miniature cutting disc to from a notch in the wire to assist with making a right angle bend.
 Bending
I then drilled a small hole in a piece of wood to hold my length of bent wire.
 Extra hands?
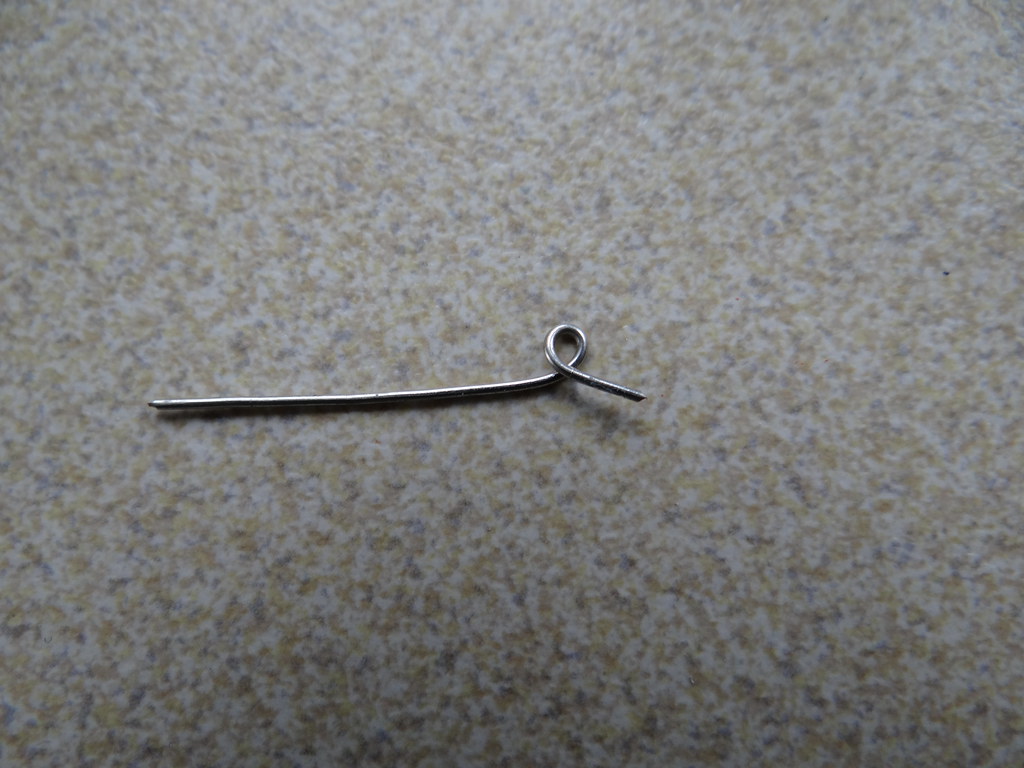
I now took a second piece of wire and formed a tight loop
 Forming a loop
I used the miniature cutting disc to remove half of this loop before squeezing it even smaller in the pliers.
 Reducing the diameter
The round wire of the loop is far too fat and needs thinning down. I decided that I needed a clamp.
 A suitable clamp
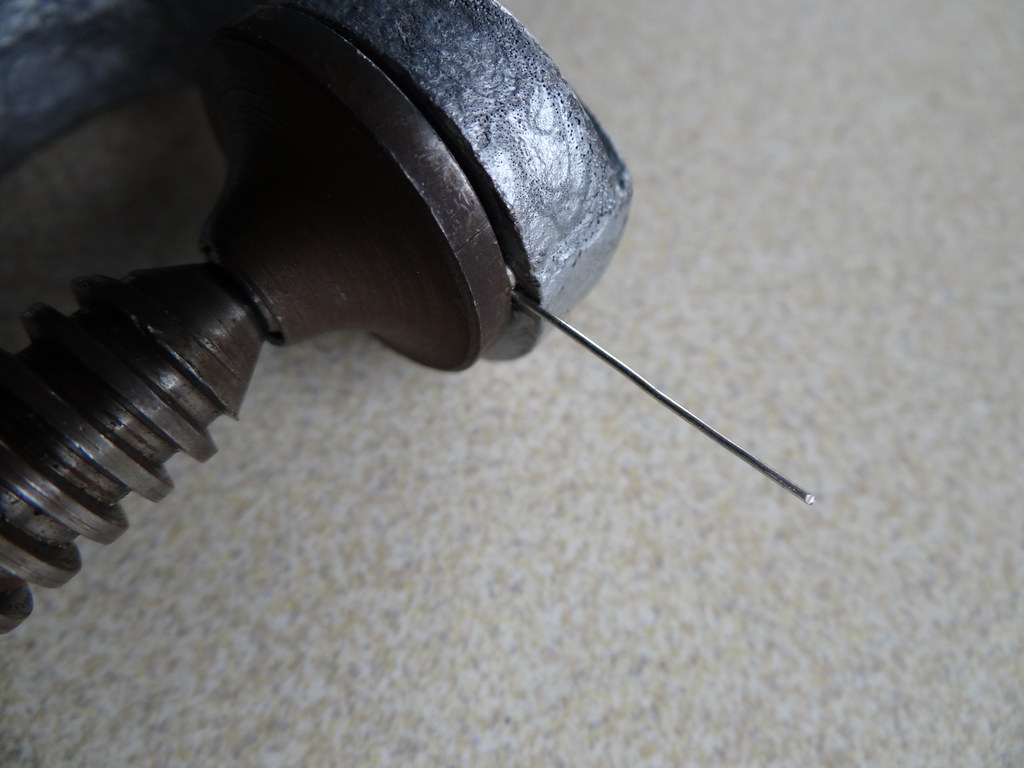
I then inserted the newly formed loop into the clamp and tightened the clamp down to flatten the copper wire.
 Flattening
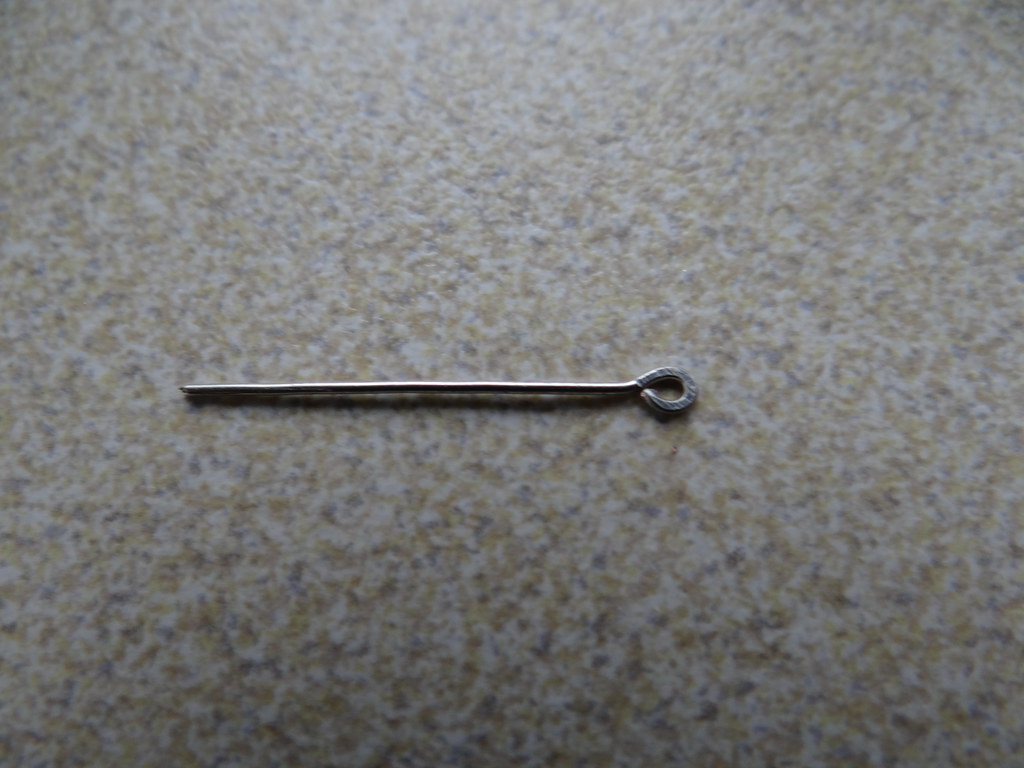
 Flattened
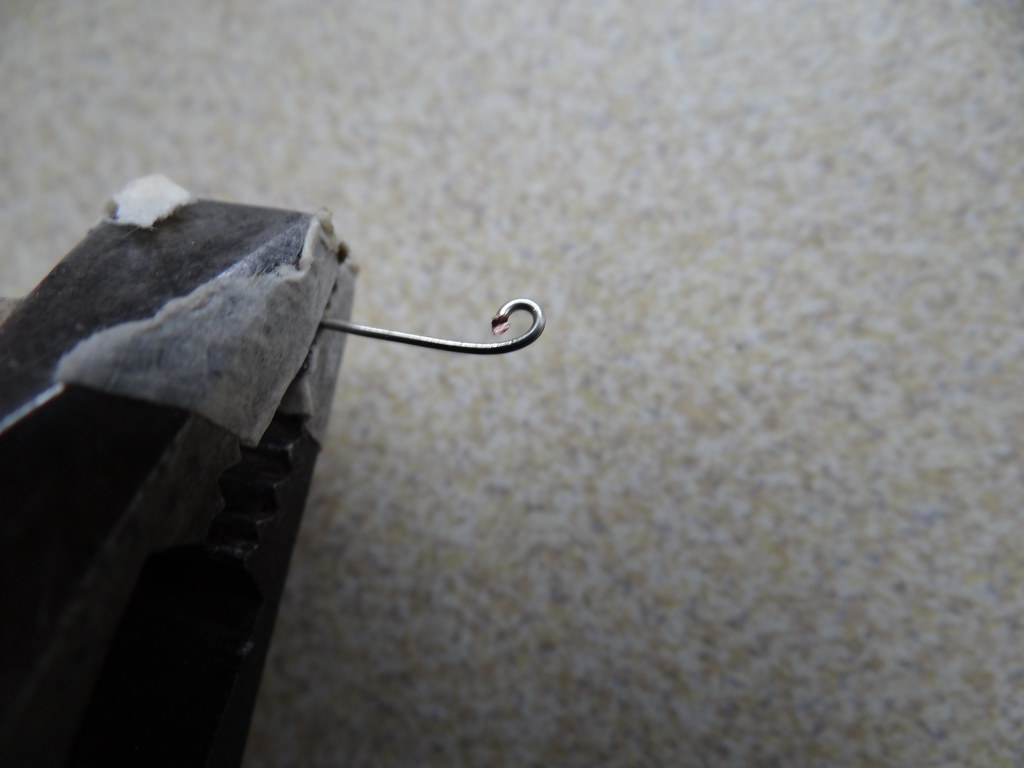
I was still not happy with the result so I used the mini cutting disc to remove some material from the outer edge.

Even thinner
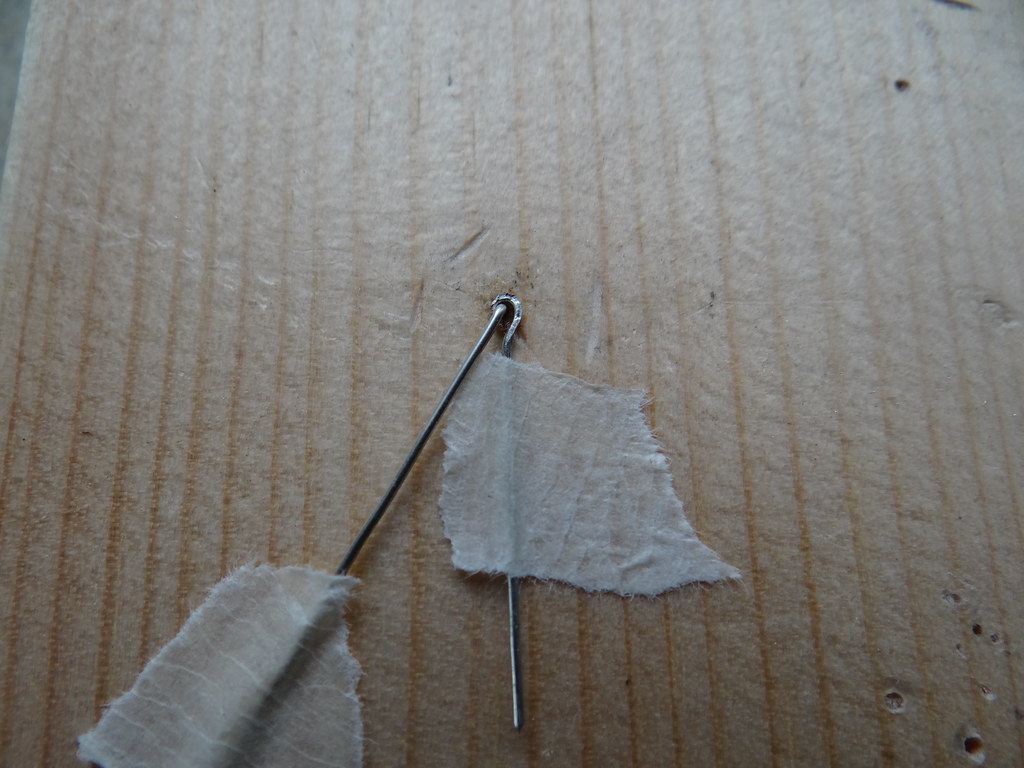
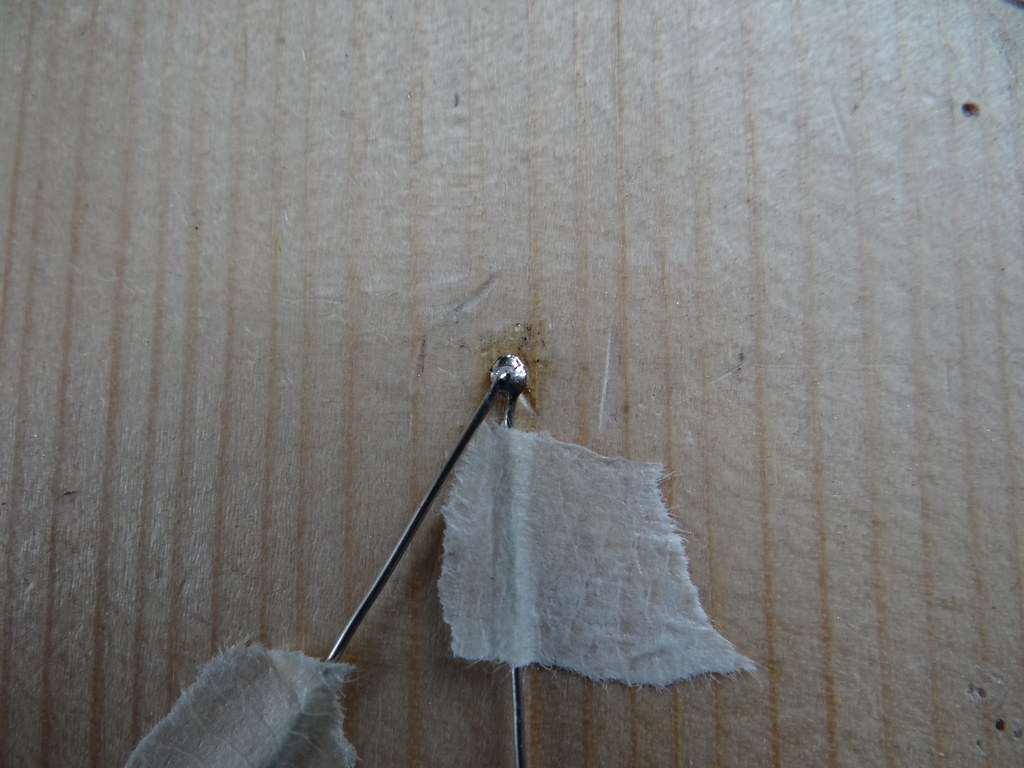
The smoke box handles can now be assembled using masking / drafting tape to hold them in place in the hole in the wooden block.
 Assembly
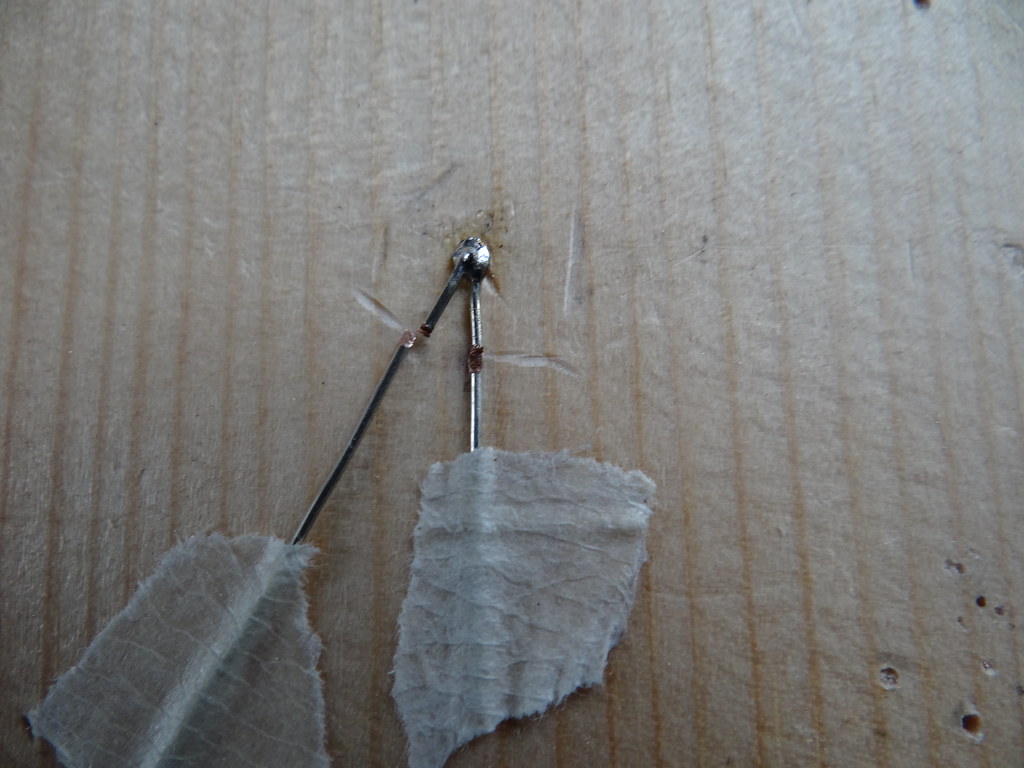
 Soldering
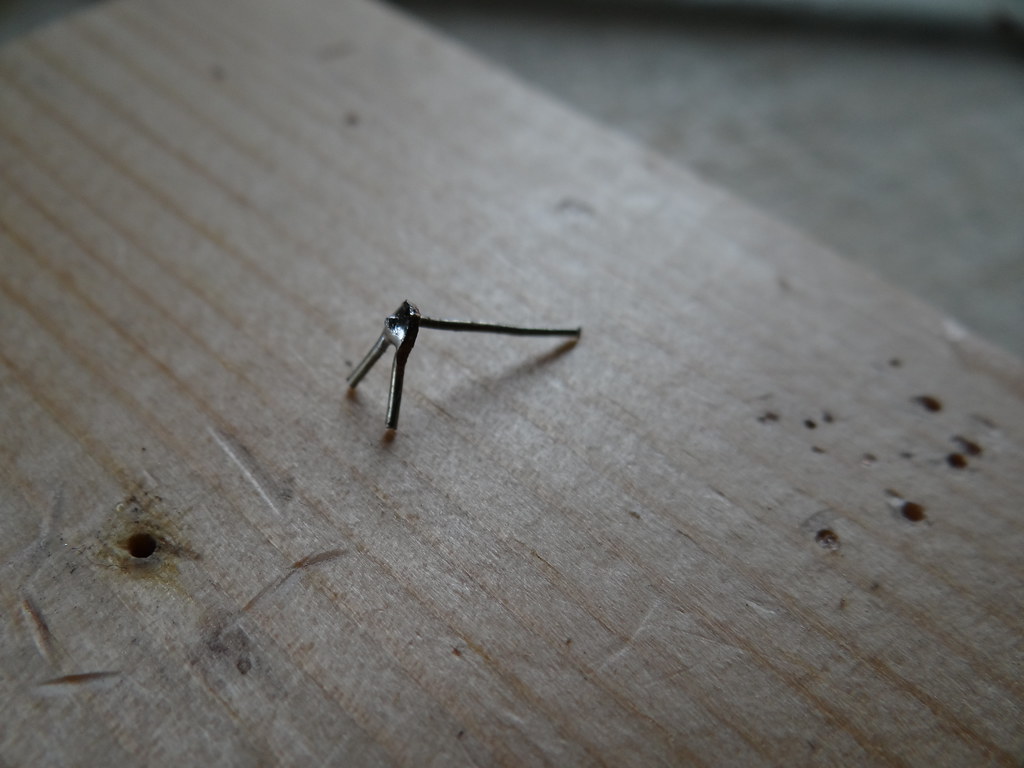
 Cutting to Size
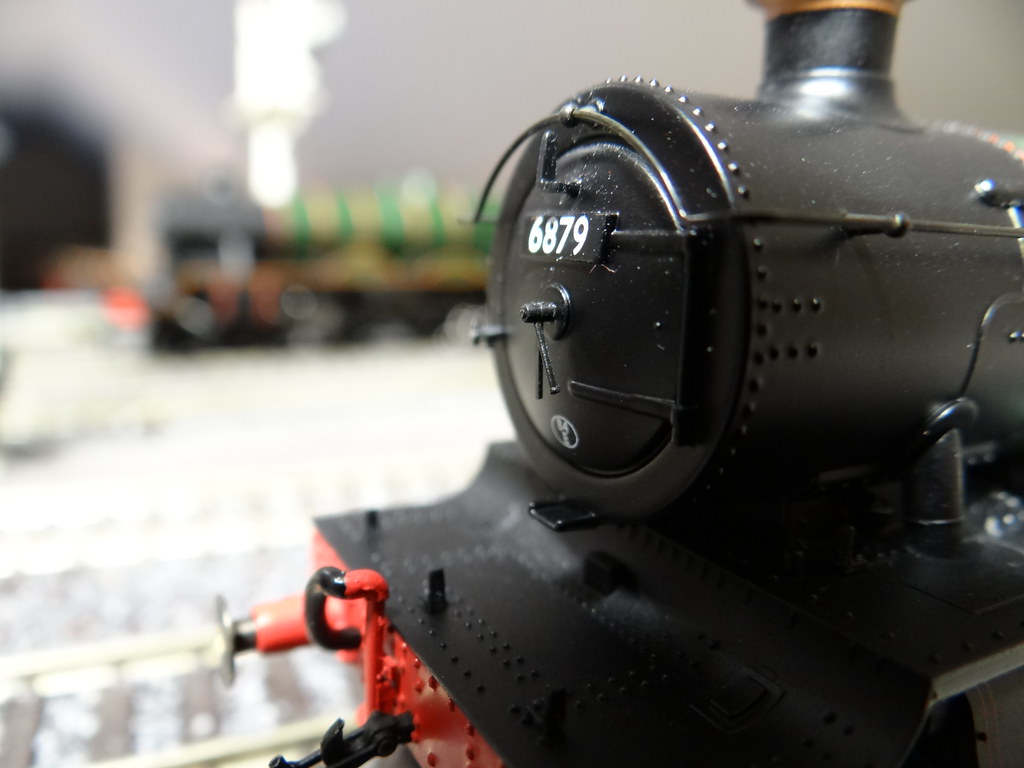
 The Finished Product
Just a reminder that in order to fit the new handles the old plastic moulding has first to be gently pared away using a very sharp craft knife, and a central hole formed.
 Not a Pretty Sight
I have to say that I discarded the first few handles that I made as not being up to standard. However with a little practice I soon found that I could make up a pair of handles in minutes and mostly I thought they were very good!
 Unpainted
 Painted
Well – how many other engines should I modify?
Yes I know that there are turned brass items for purchase but I was born in Yorkshire and I still relish the challenge of saving some money!
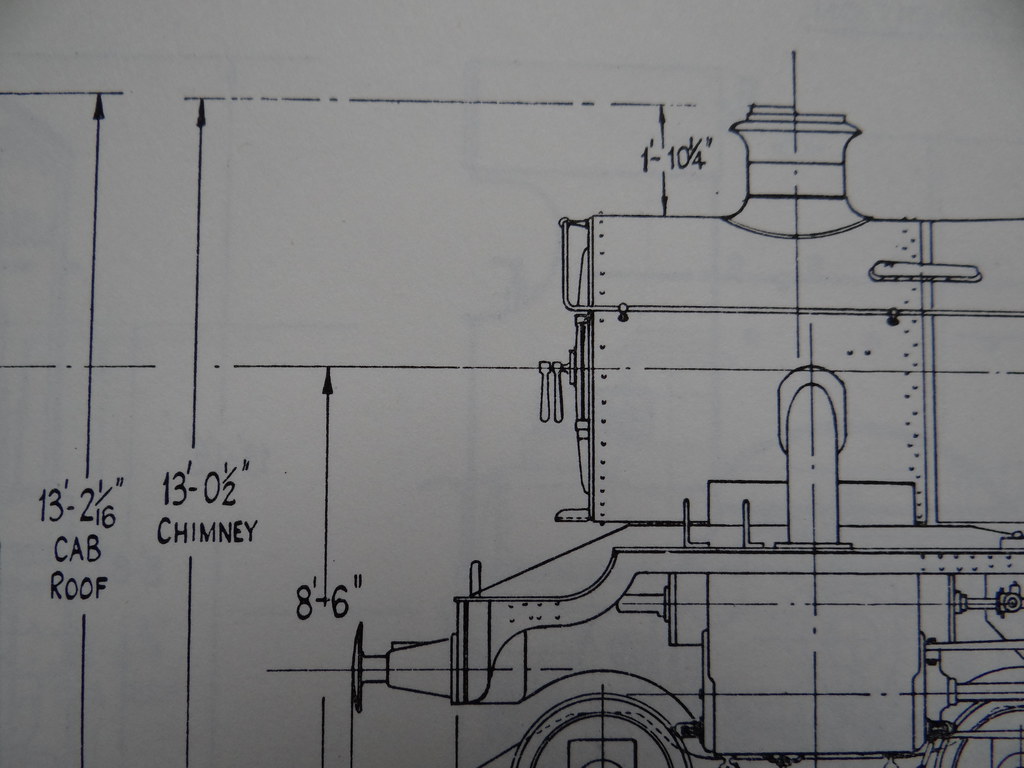
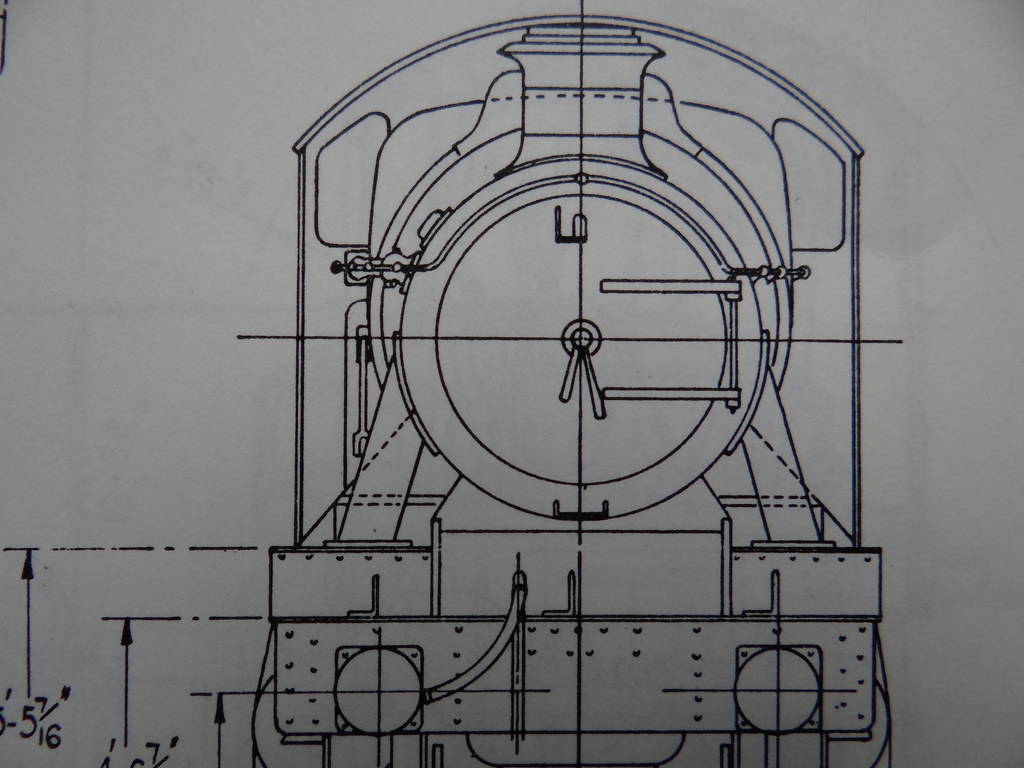
What should Smoke Box Handles look like? Well there are drawings which variously show two equal length handles around 12 inches long, or on some drawings the lowest handle closest to the smokebox is elongated to 15 inches. How have Bachmann and Hornby modelled these handles?
The early Bachmann engines such as the 22xx continued the Airfix Dapol tradition and moulded the handles as a lump of plastic on the front of the smoke box door. Later Bachmann models such as the Halls, Manors and 43xx compromised with the bottom handle still moulded on the face of the door, but with the top handle as a separate item.
Most recently Bachmann on their ROD Class locomotives have correctly modelled the two handles separate from the smoke box door.
The latest Hornby handles on the 28xx Class look to me to be almost perfect. In contrast the handles fitted to the slightly earlier Hornby Grange locomotives are to my thinking far too delicate.
 Hornby Grange
What about my Dapol County? More to the point, what materials had I available? I had wired up my control panels using single core 0.6mm wire – I had lots of bits left over and it looked very suitable.
First the wire had to be stripped.
Then I used a miniature cutting disc to from a notch in the wire to assist with making a right angle bend.
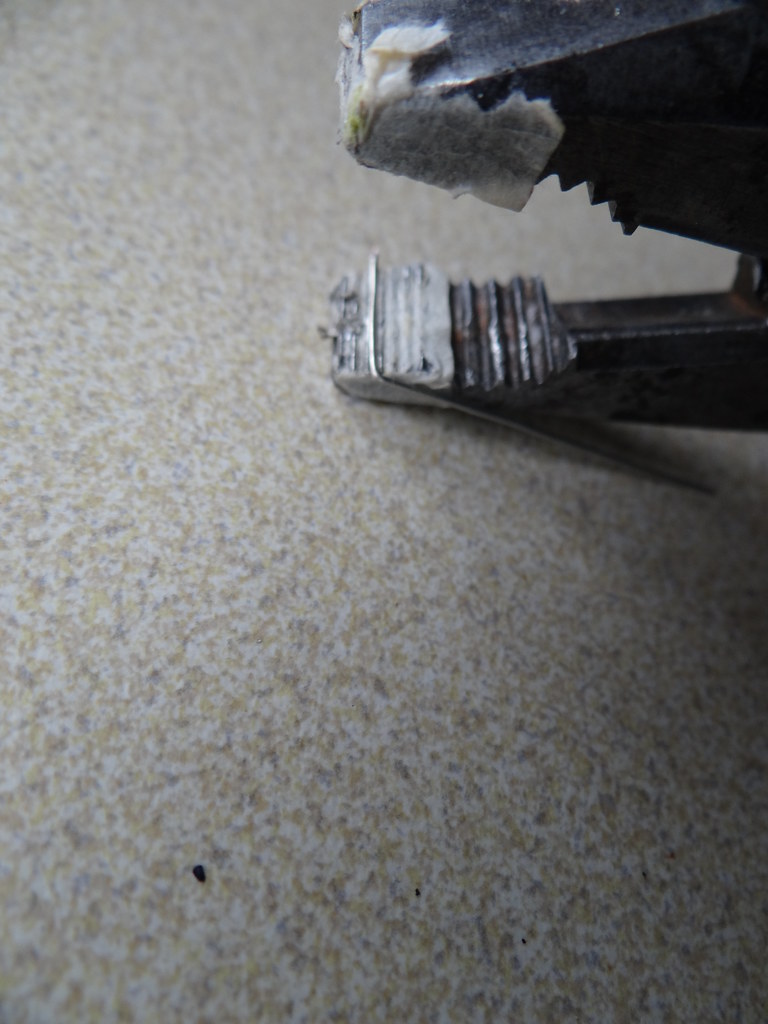
I then drilled a small hole in a piece of wood to hold my length of bent wire.
I now took a second piece of wire and formed a tight loop
I used the miniature cutting disc to remove half of this loop before squeezing it even smaller in the pliers.
 Reducing the diameter
The round wire of the loop is far too fat and needs thinning down. I decided that I needed a clamp.
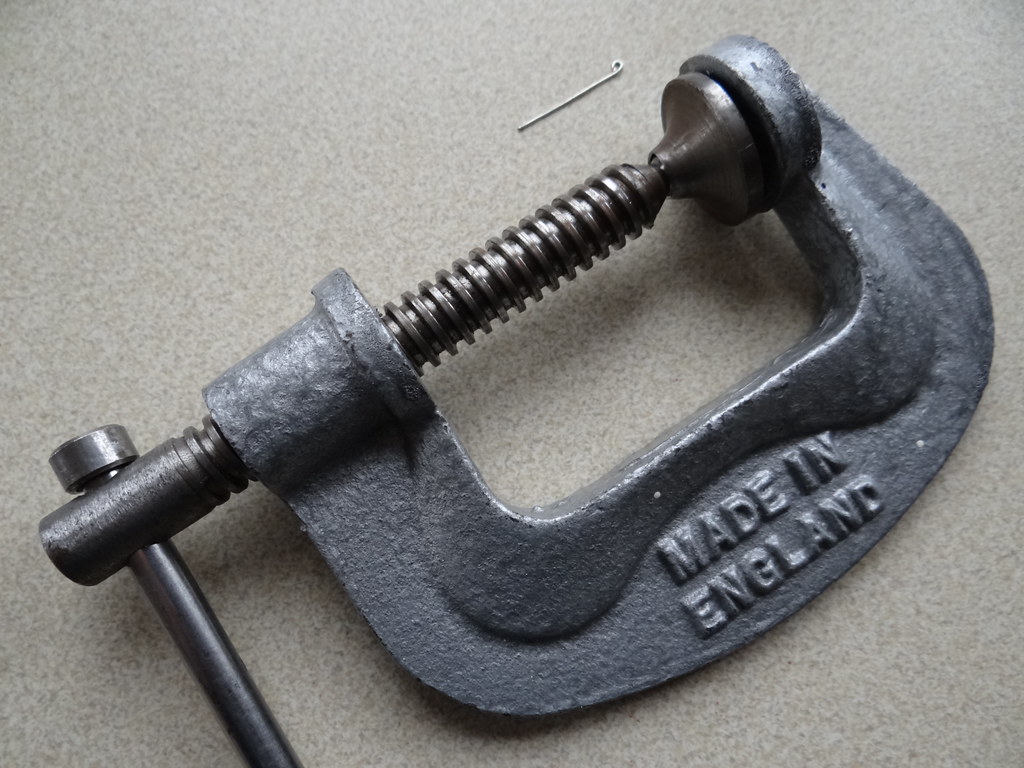
I then inserted the newly formed loop into the clamp and tightened the clamp down to flatten the copper wire.
I was still not happy with the result so I used the mini cutting disc to remove some material from the outer edge.
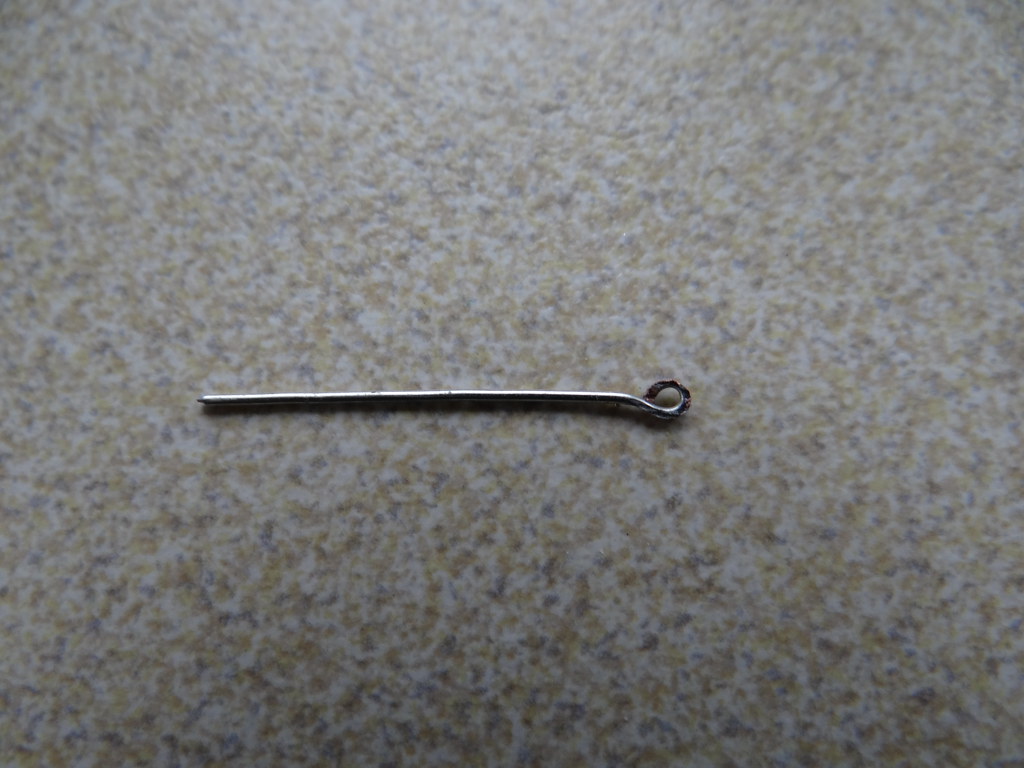
Even thinner
The smoke box handles can now be assembled using masking / drafting tape to hold them in place in the hole in the wooden block.
Just a reminder that in order to fit the new handles the old plastic moulding has first to be gently pared away using a very sharp craft knife, and a central hole formed.
I have to say that I discarded the first few handles that I made as not being up to standard. However with a little practice I soon found that I could make up a pair of handles in minutes and mostly I thought they were very good!
Well – how many other engines should I modify?


Comments