No. 147 Black is black I want my loco back (Heljan Night Owl)
I am really very pleased with my black Heljan 47xx. I think it is becoming one of the best ever locomotives to grace my layout. It has been a long journey which will not suit everybody. However ‘job done’ and I am well pleased.
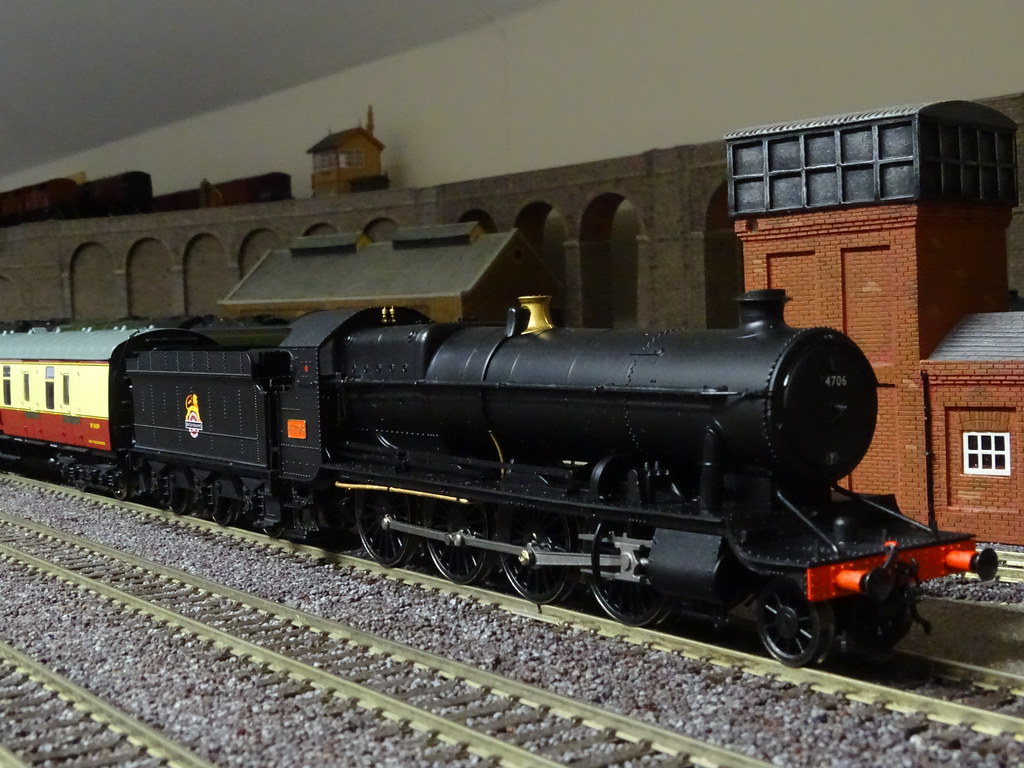
Heljan 4706 BR Black 'Night Owl
When Heljan announced their 47xx I preordered a BR green
model. I read with interest the associated thread on RMweb and noted the trials
and tribulations with 4706 the ‘black’ model. I dithered. I cancelled my
preorder. Then I reordered and took delivery – ‘Shades of Green’.
I was well pleased with my green model; it ran like a sewing
machine and arrived mostly in one piece. (It was only after I had written my
last Blog Post and I was reviewing the pictures that I noticed that one of the
lamp irons had ‘fallen over’ - now sorted.) I was so impressed with my green
engine that whilst new models were still available I would purchase 4706, the
BR black engine. Sadly all the stories I had read, about models arriving
damaged and bits hidden in the cardboard packaging proved to have been true.
Hattons must be very patient. I returned two models (plus an empty box). I
could have returned the third model. However given the state of the first two
rejects I realised that this third model was unmarked and whilst they were not
all actually attached, all the bits were present and correct. The model was
worth fettling.
Engine No.3
Having handled three black engines and one green engine I
have gained the impression that there are two issues with the Heljan models.
There is evidence that the consignment of black engines was subject to great
trauma – dropped from a great height? The 47xx is a weighty model and a lot of
the detail seems to have been added using super glue with minimal mechanical
keying. Bits have shaken free, I would say before arrival at the retailer.
Probably due to location within the consignment, some models appear to have
been driven down into the vacuum plastic packaging with such force that the cab
steps have been deformed or broken off. Butanone is wonderful stuff.
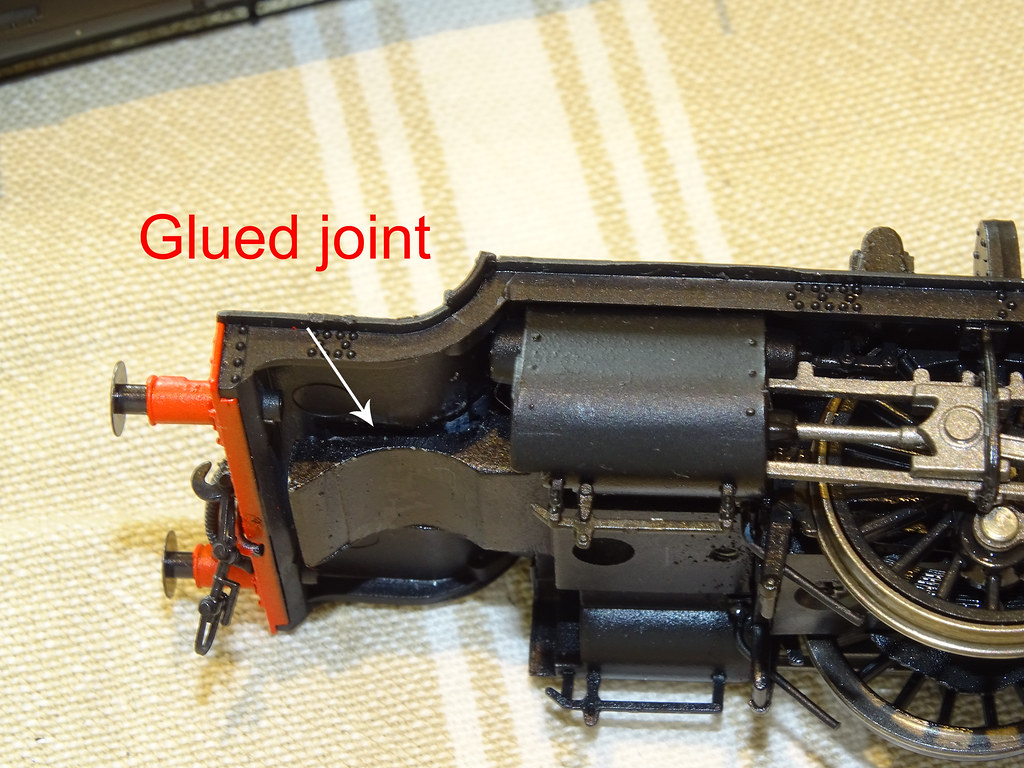
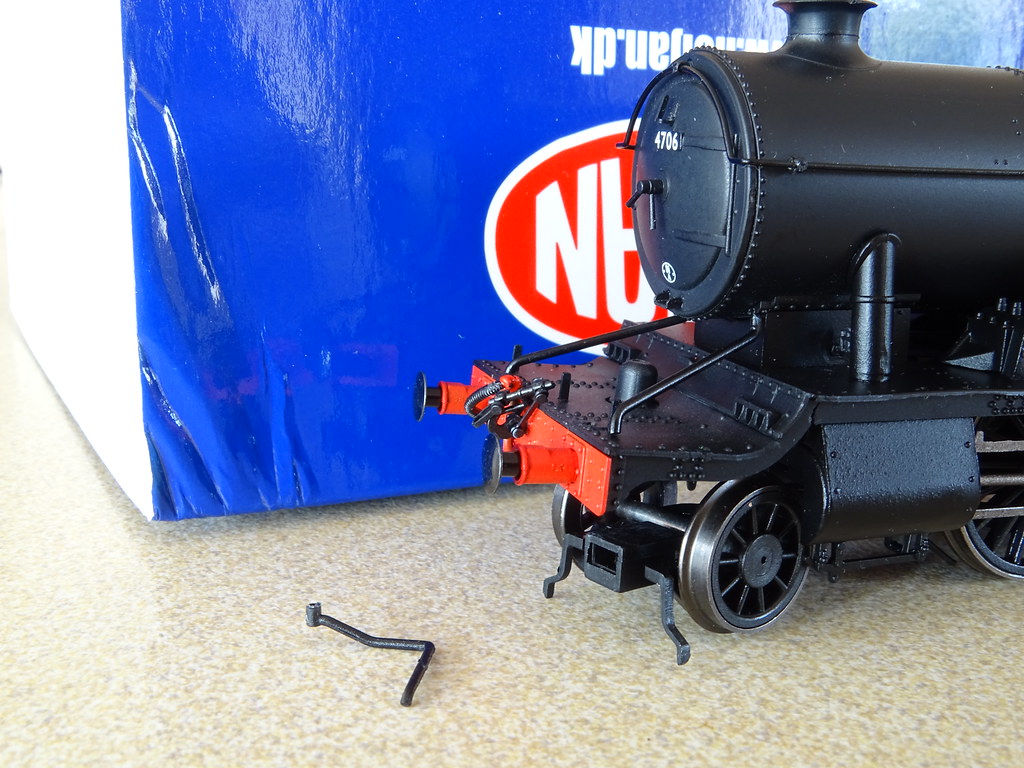
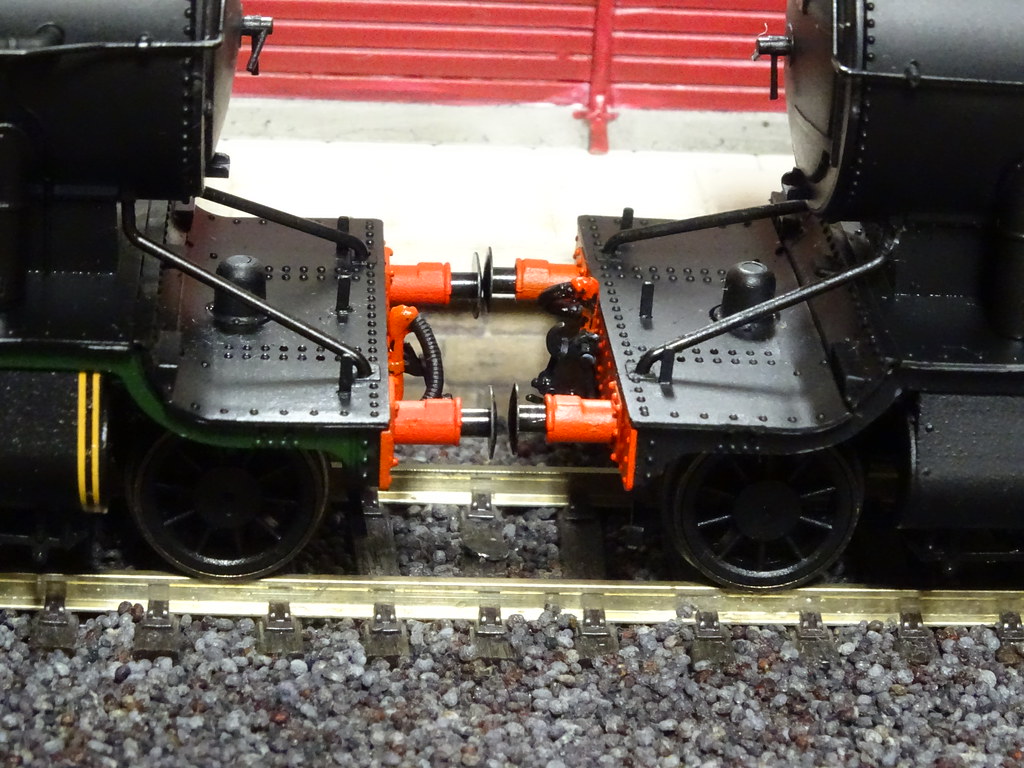
Glued joint
The second issue relates to the footplate in front of the
smokebox. I received two models where the front section was loose (but still
attached), and one model which was complete in one piece but where the buffers
pointed skywards (it also refused to run but I chose not to investigate that
aspect any further). On the third model, the one that I chose to keep, the
front section of footplate was loose and one of the stays beneath the smoke box
had popped out. However much pressure I exerted I couldn’t get the footplate to
lie level. Was it excess dried glue, or is the shape of the Mazak chassis
wrong?
‘robmcg’ in a Post on RMweb has some better pictures of the
problem and solution where his model arrived with the footplate sheared off.
Because my footplate was still intact I set about
dismantling the engine. This proved more difficult than I had imagined but I
did eventually gain better access to the underside of the footplate and the top
of the chassis, sufficient to be able use a small blade and to pare some
material away.
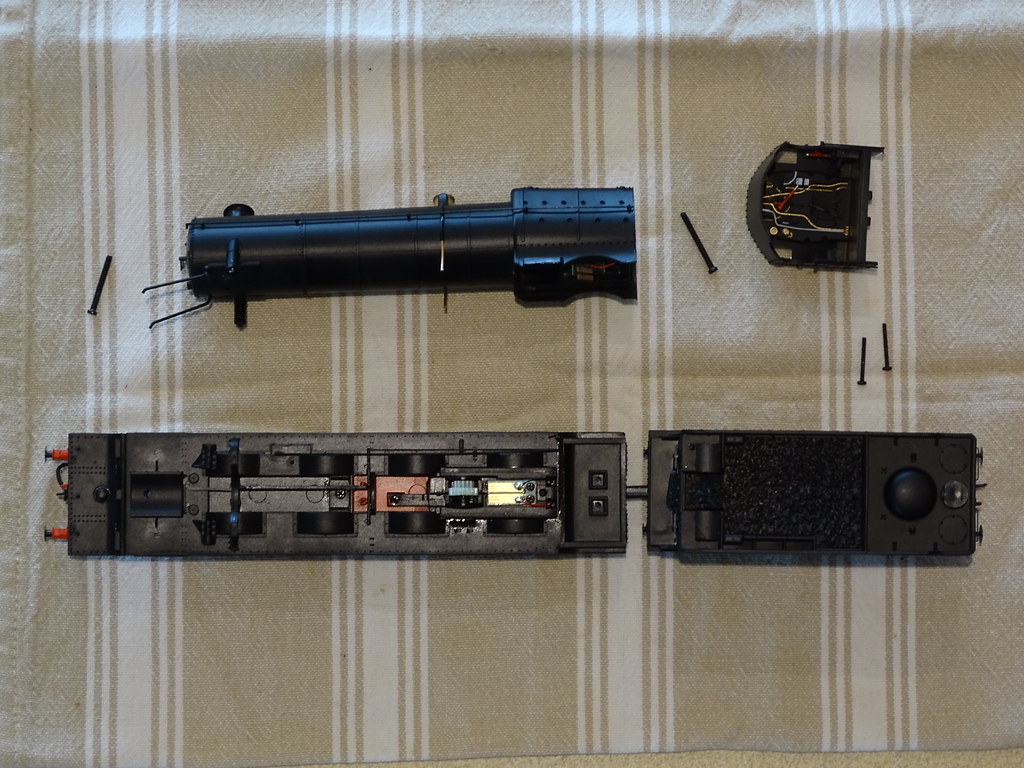
Exploded diagram
The cab on the engine is a completely separate item and has
to be released first by removing two screws on the underside of the chassis.
The boiler with its weight enclosing the motor can then be released by undoing
two further bigger screws. [b]Beware[/b] - the weight inside the boiler is
amazingly heavy and slides in and out like anything (as per Winnie the Pooh). I
had thought that the footplate could then be lifted clear of the chassis. Sadly
not, the footplate is attached to the pipework beneath the cab which in turn is
glued to the bottom plate that retains the driving wheels. Too much flexing of
the pipework and it starts to lose its coating of brass paint. On my green
engine the footplate in front of the smoke box is glued down to the chassis.
Seemingly this joint had failed on my black engine. I did try reassembling
without glue but reluctantly the only way I could make a permanent fix was to
reattach using super glue. Replacing the two metal stays beneath the smokebox
was a bit like one of those Chinese Christmas puzzles. At the finish I lightly
glued the stays into the smokebox before refitting the boiler and finally
pressing the other end of the stays into the footplate. I tend to agree with
‘Coachman’ on RMweb who thought the Heljan stays are too short. He remade some
to be longer and hence better able to press the footplate level.
My black engine is not perfect, but then on close inspection
neither is my green engine.
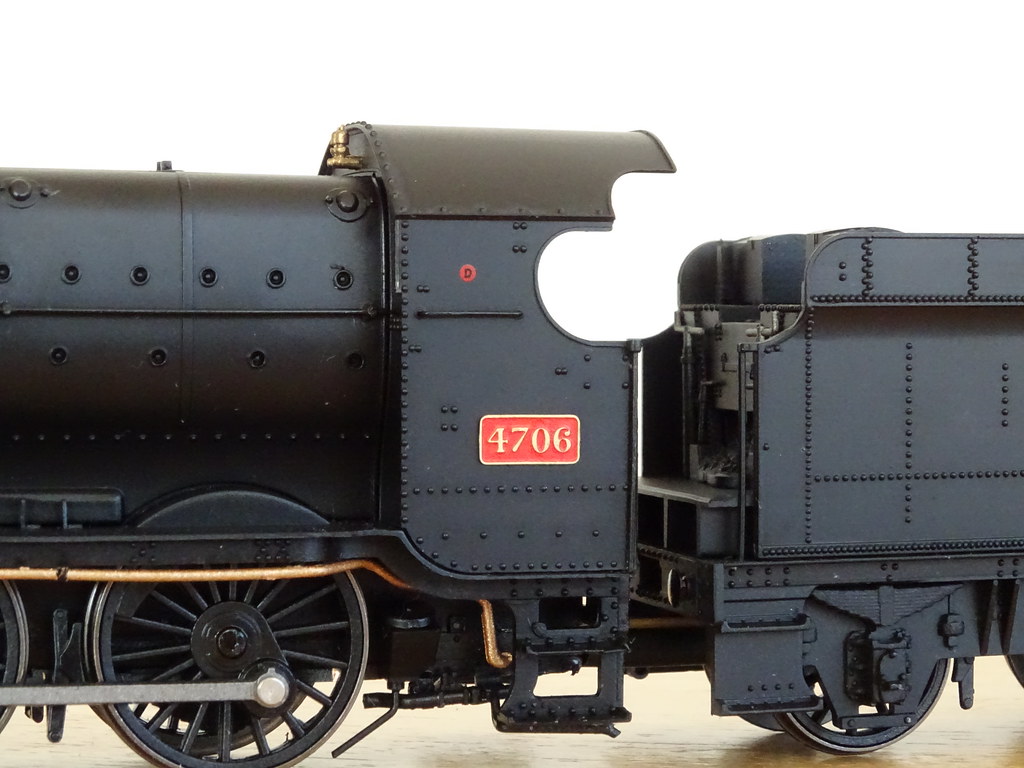
Heljan 4706 BR Black 'Night Owl' (right) 4705 BR Green
(left)
Now what about the other issue, the elephant in the room?
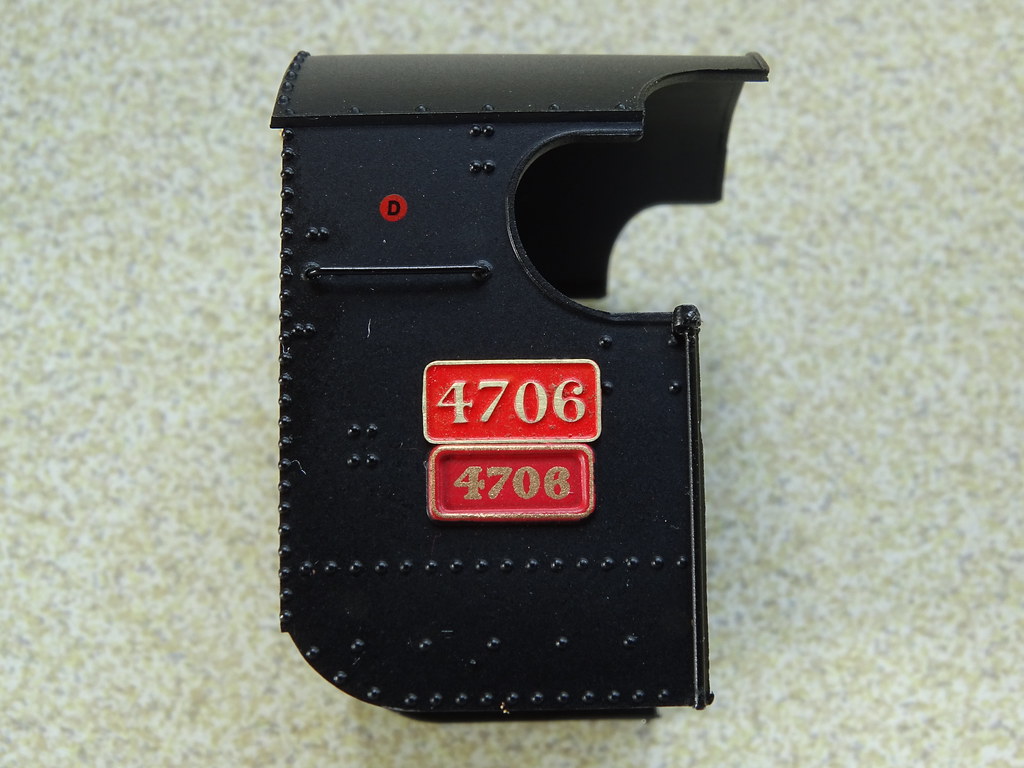
Cab side number plates
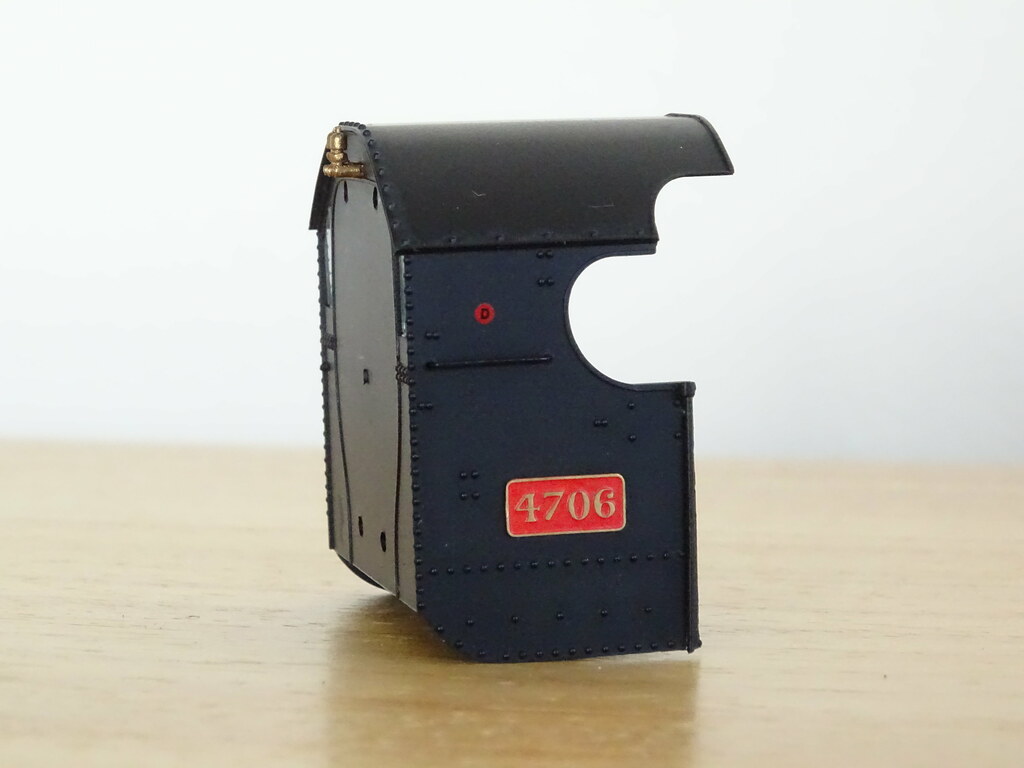
There is the small matter regarding the size of the cab side
number plates, not forgetting the red dot. Heljan’s small moulded plates had to
go, and I purchased some etched plates from 247 developments. I bought plates
with a black background and recoloured them using some Humbrol ‘signal red’
paint from long past.
With the cab removed from the engine I set about grinding
off the moulded number. The task is helped by the Heljan number being smaller
than the finished engraved plates.
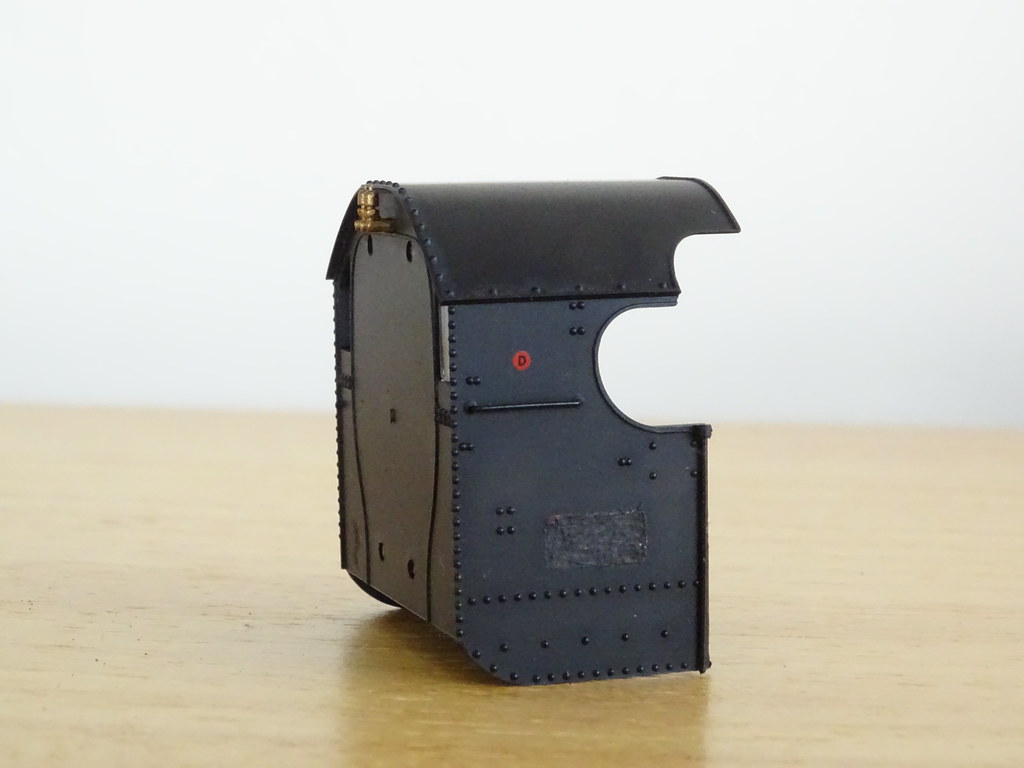
Black Cab?
Working on the ‘kitchen table’ I held the cab with a heavy G
clamp and used a Proxxon drill fitted with a diamond coated grinding bit. The
Proxxon is a relatively new purchase and it is worth noting that it runs
beautiful and true – unlike the rather cheaper variant that I previously used.
Tools of the trade
Black on black is difficult to see and I cannot over
emphasise the importance of some good natural light. Also the need to clamp the
work leaving two hands free to steady the drill. I have to own up wrecking my
first cab when I used a craft knife to speed up the grinding process. Luckily
Heljan have had a few models returned and would sell me a replacement cab.
Job done
To avoid lots of repainting I attached my etched plates over
the area of the original Heljan plates. Is this correct or should the new
plates have been positioned centrally?
Courtesy of Mr Roche
Thank you John Tomlinson, on Flickr, for checking some David
and Charles illustrations. These are reported to show the middle of the cabside
number plate directly below the most forward part of the curve of the cab
cutout, as mine have turned out.
A good outcome
The red dot lives on for another day. Black engines and
crimson and cream coaches are a very distant memory but I am well pleased with
the combination below.
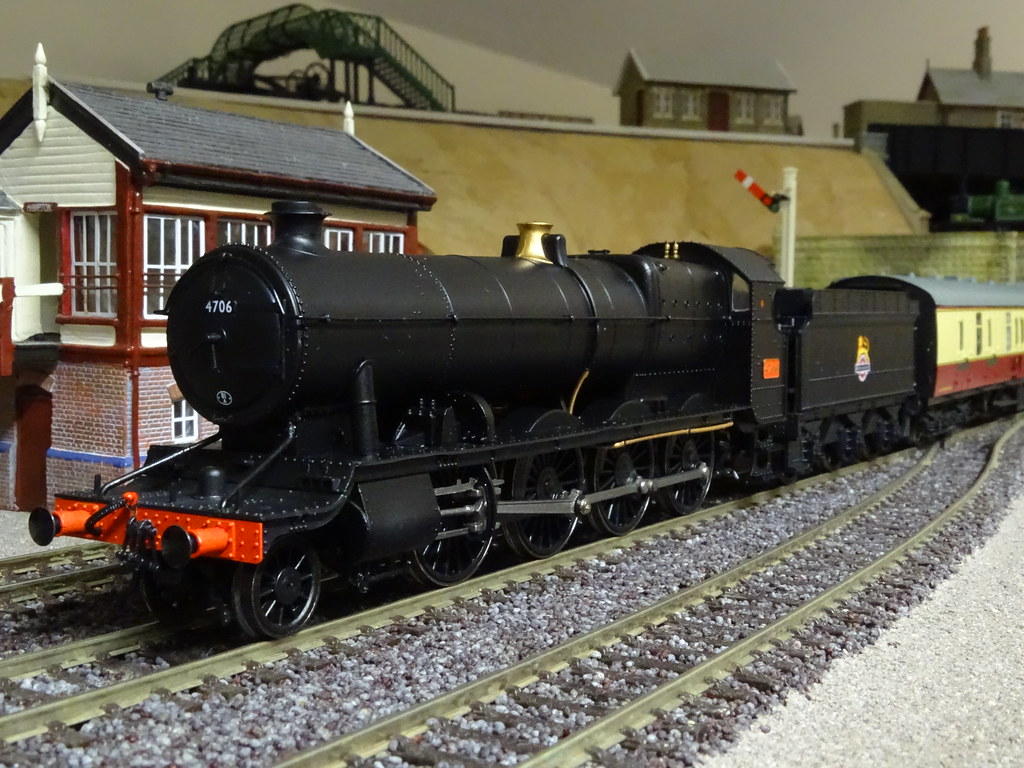
Heljan 4706 BR Black 'Night Owl'
There is a video on YouTube prior to fitting the plates and
blackening the wheel centres which confirms the excellent mechanical
performance of the Heljan Model.
- Now what about Black is Black:
Post Script
That broken piece of plastic - well it comes from beneath the rear cab foot steps:


Comments