No.49 In the beginning there was a space – how is it being used?
One or two of you have asked if I can describe the layout
itself in more detail.
What were the layout constraints? The minimum radius had to
be 36inches / PECO Medium Radius. The layout must accommodate seven coach
trains – for ‘steam’ hauled trains past experience suggested gradients no
steeper than 1 in 60. For operational
interest there needed to be a mainline (terminus), an ex GWR branchline
(terminus) and hidden sidings / reversing loop representing the rest of British
Railways. The layout also had to
incorporate a section of ‘continuous run’ for test purposes and somewhere to
simply 'watch trains going by’.
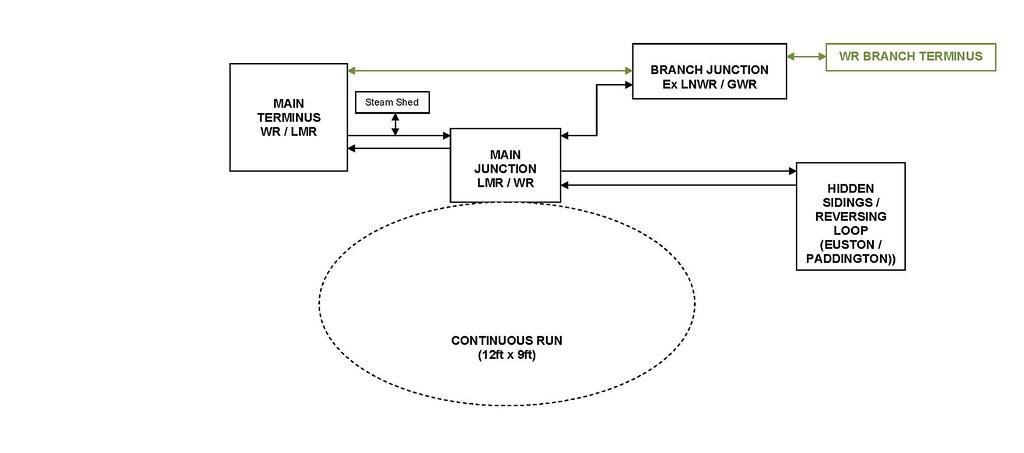
The figure above is a schematic of the initial layout and
shows the Main Terminus with a double track mainline leading to a Main Junction
and on to Hidden Sidings / Reversing Loop.
There is also a single track Branchline (ex GWR) with a separate Branch
Junction with both ex GWR and ex LNWR running rights and a Branch Terminus.
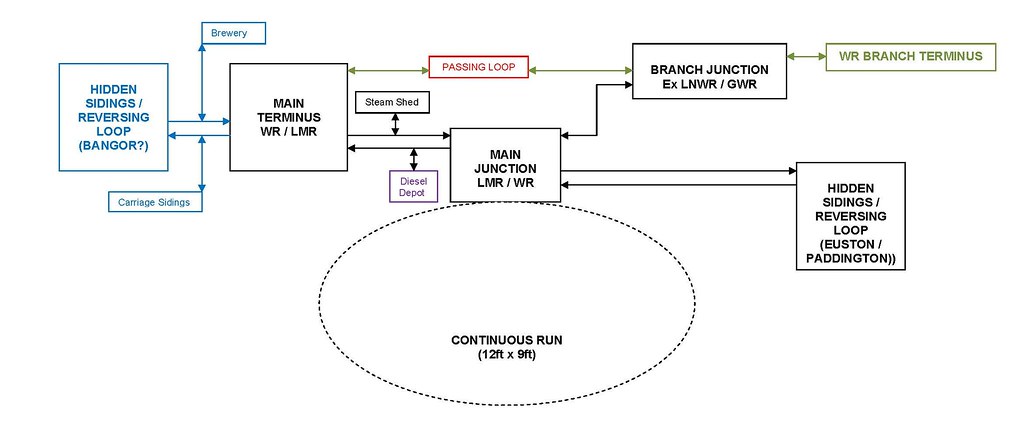 I would say that it is only after ‘playing trains’ that you
realise the shortcomings of a particular layout. The schematic above shows the current
layout. One of the earliest additions to
the initial scheme was a Passing Loop on the single track branch line. Not only did this provide temporary storage
for a ‘branch train’ but the incorporation of a station with a bay platform
gave a reason for the use of an ‘autotrain’ / ex GWR railcar.
I would say that it is only after ‘playing trains’ that you
realise the shortcomings of a particular layout. The schematic above shows the current
layout. One of the earliest additions to
the initial scheme was a Passing Loop on the single track branch line. Not only did this provide temporary storage
for a ‘branch train’ but the incorporation of a station with a bay platform
gave a reason for the use of an ‘autotrain’ / ex GWR railcar.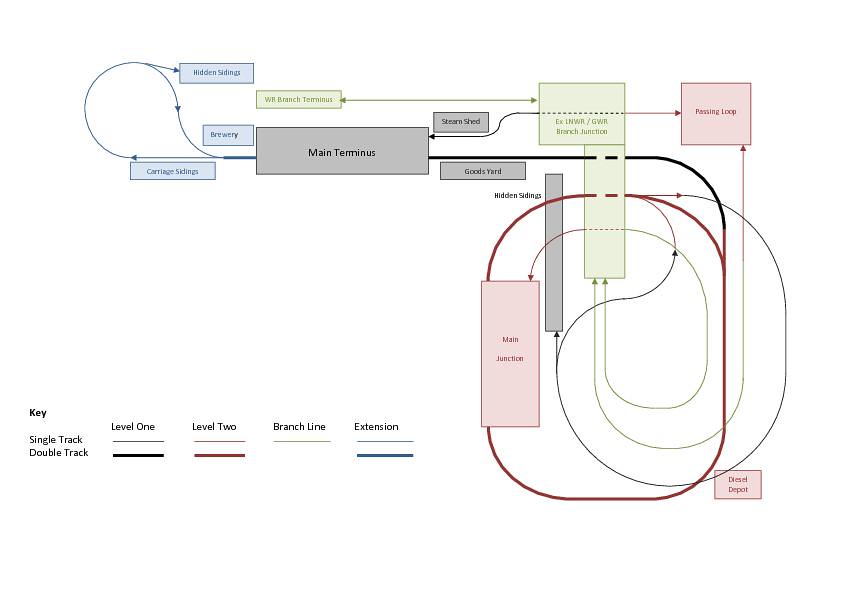
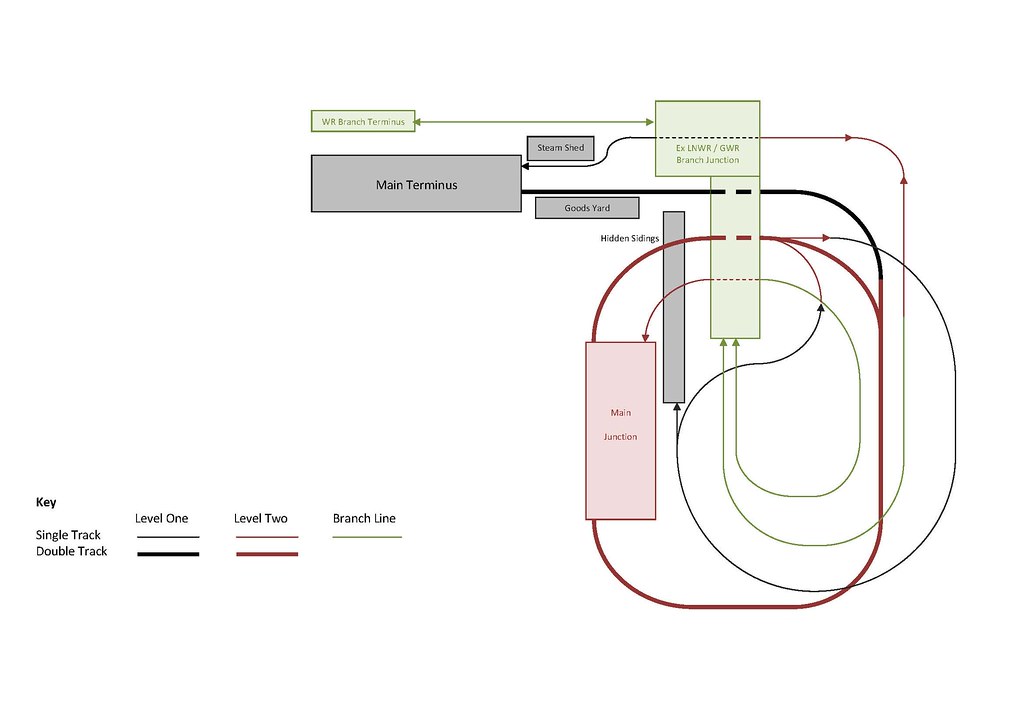
The largest addition was an extension to the Main Terminus
to create a ‘through station’ leading to another set of Hidden Sidings /
Reversing Loop. In due course the
extension will feature a Brewery (Scenecraft variety) and a raised area with
housing to hide some of the trackwork.
An unforeseen benefit of the second Reversing Loop is that
the double track main line has been converted into a huge ‘dumbbell’ where a
train takes at least three minutes to travel the whole of the double track main
line before returning to its original starting point. There are some videos on YouTube with trains
going round and round the
layout at various stages of ballasting.
Like all good plans the original paper copy seems to have
disappeared. In due course it is my
intention to provide here track layout details for all the individual stations.


Comments